
The Grow Monster is always looking for ways to extend the growing season when it comes to seed starting. One way to extend the season is with a method called winter sowing using milk jugs. The Grow Monster has reviewed many of the approaches out there and has been saving up milk jugs to give the method a try. We put this definitive guide to winter sowing using milk jugs together to help you easily start your seeds outside in the winter.
9 Easy Steps for Winter Sowing:
- Plan Ahead for Winter Sowing
- Collect the Milk Jugs
- Add Ventilation and Drainage
- Cut the Milk Jug
- Add Soil to Milk Jug
- Sow Seeds and Label Milk Jug
- Place the Milk Jugs Outside
- Monitor the Milk Jugs
- Transplant Seedlings
Winter sowing is a method used to start seeds outdoors in mini greenhouses during the winter to get a head start on your spring growing season. Read on to learn how you can start winter sowing with our step by step guide complete with photos!
Plan Ahead for Winter Sowing
The Grow Monster has reviewed many of the methods and variations for winter sowing seeds using milk jugs and many of those methods have you diving right into getting the jugs and cutting them open. The Grow Monster believes in order to get the best benefit with this method you should take a step back and kick start with one important thing: Plan Ahead for Winter Sowing.
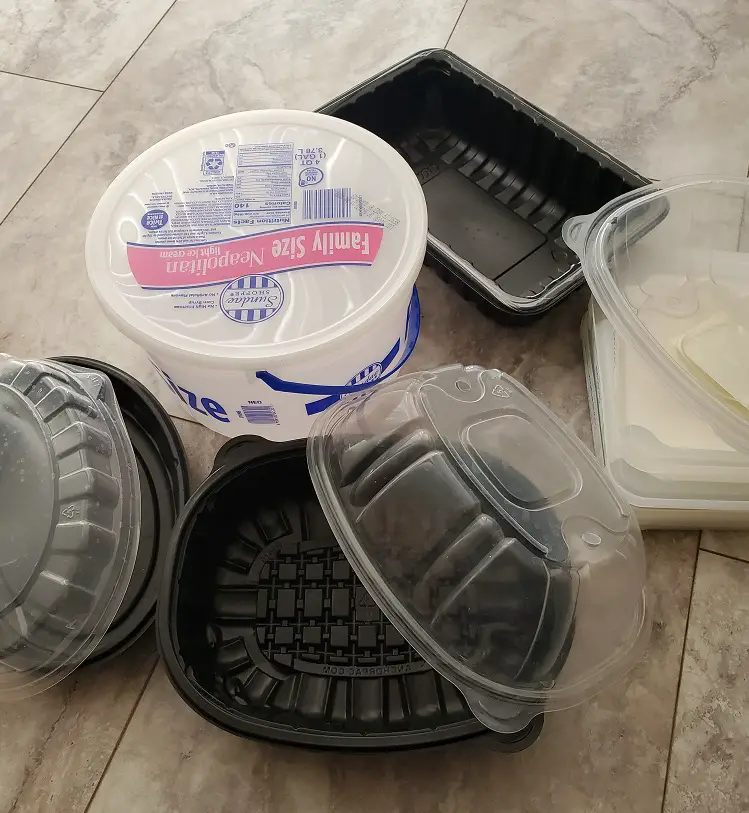
You will need to start this step in the fall so that you will have adequate amount of time to collect and save milk jugs you need for winter sowing. You can also use other containers like those that fried chicken comes in if milk jugs are harder for you to find. This requires you to explore three important questions: what are you planting, how many milk jugs will you need, and when do you winter sow the seeds?
What are You Planting?
Winter sowing requires you to understand what your overall gardening vision is for the next year. This first step also requires you to understand that not all plants you intend to grow over the next year can be started using winter sowing. This method works best for starting self-seeding flowers, winter vegetable / cool season crops such as kale, swiss chard, english peas, along with those root-based crops such as carrots, radishes, and onions.

The Grow Monster would also like to throw chamomile in there as well as we have had good success growing chamomile outdoors in pots over the winter months. Perennial seeds, herbs, and annuals with higher cold tolerance can also be started with winter sowing. Plants such as Coneflower require lower temperatures for seed germination according to various studies and the same with Sweat Peas.
You may not want to use this method for starting warm weather crops such as corn, tomatoes, or peppers. They require warmer temperatures for the seeds to germinate and in the rare chance that they do germinate in the containers wouldn’t take kindly to the colder temperatures that may be experienced using this method. If you have extra seeds and containers, you may very well try experimenting if winter sowing will work in your area for these plants if you live in one of the warmer zones.
Planning for the next growing season is important, and you will need to get a list together of all the plants you’d like to grow. Then, break that list down into cool weather crops and warm weather crops. For those crops that are cool weather crops, you will be applying the winter sowing method. The Grow Monster just wants to save you some time and disappointment from starting the wrong seeds with this method. Below is a partial list of cool weather crops broken down into vegetables, herbs, annuals and perennials recommended for this method along with notes from The Grow Monster:
| Plant | Type | TheGrowMonster notes |
| Broccoli | Vegetable | Winter sowing Broccoli can help avoid early damage by the cabbage butterfly. The plant should be much larger using this method by the time (May-June) the butterfly makes its rounds laying eggs on this brassica plant. Protective netting is recommended once they are transplanted into the ground. |
| Carrots | Vegetable | We have had success sowing in the fall directly outside without the use of a container. |
| Collard Greens | Vegetable | Winter sowing Collard Greens can help avoid early damage by the cabbage butterfly. The plant should be much larger using this method by the time (May-June) the butterfly makes its rounds laying eggs on this brassica plant. Protective netting is recommended once they are transplanted into the ground. |
| Cauliflower | Vegetable | Winter sowing Cauliflower can help avoid early damage by the cabbage butterfly. The plant should be much larger using this method by the time (May-June) the butterfly makes its rounds laying eggs on this brassica plant. Protective netting is recommended once they are transplanted into the ground. |
| Cabbage | Vegetable | Winter sowing Cabbage can help avoid early damage by the cabbage butterfly. The plant should be much larger using this method by the time (May-June) the butterfly makes its rounds laying eggs on this brassica plant. Protective netting is recommended once they are transplanted into the ground. |
| Lettuce | Vegetable | Before we moved, we were able to see over 10 generations of lettuce thanks to the natural reseeding and winter sowing of the seed directly into the garden in combination with a hoop house. Winter sowing is a great option for starting your lettuce plants! |
| Kale | Vegetable | Winter sowing Kale can help avoid early damage by the cabbage butterfly. The plant should be much larger using this method by the time (May-June) the butterfly makes its rounds laying eggs on this brassica plant. Protective netting is recommended once they are transplanted into the ground. We’ve had success sowing this directly outside in the garden in the fall with the plant continuing to grow through the winter in zone 7. |
| Bok Choy | Vegetable | We haven’t tried this yet, but on our list to-do. |
| Swiss Chard | Vegetable | We’ve had pretty good success with this plant sewn directly into the garden as it has survived through the winter for us in Virginia. Winter sowing is a great option for starting your Swiss Chard plants! |
| Peas | Vegetable | We have grown peas, but have not started them yet using this method – on our to-do list. |
| Leeks | Vegetable | We haven’t tried this yet, but on our list to-do. |
| Radish | Vegetable | We have had success sowing in the fall directly outside without the use of a container in zone 7. Winter sowing is a great option for starting your Radish plants and you can harvest directly from your container! |
| Onions | Vegetable | Onions take a long time to grow from seed, use winter sowing to sow Onions heavily and then transplant when the ground is workable at the proper spacing. If you are growing Onions from sets or for seed/flower, you can learn more in this post about growing Alliums. |
| Garlic | Vegetable | Garlic bulbs are usually planted directly in the ground in fall to harvest the following summer. See this post if you’d like to learn about planting bulbs when the ground is frozen. |
| Arugula | Vegetable | Arugula is a member of the Brassica family and a good candidate for winter sowing. |
| Brussel Sprouts | Vegetable | Brussel Sprouts should be planted in the fall but can be a good candidate for winter sowing if you want to have a staggered harvest throughout your growing season. |
| Sage | Herb | We haven’t tried this yet, but on our list to-do. |
| Oregano | Herb | Oregano is a great candidate for winter sowing and once you have an established plant it will continue to grow throughout the winter depending on your growing zone. |
| Chamomile | Herb | We’ve had success growing this from natural winter sowing of seeds as they will germinate and grow throughout the winter depending on your zone without a covered container in a partial shade spot. Chamomile is a great candidate for winter sowing! |
| Dill | Herb | We’ve had success growing this and are eager to try it using the winter sowing method. Dill will be a much hardier plant when sown during the colder temperatures of winter, which makes Dill a great candidate for winter sowing. |
| Marigold | Annual | We’ve had success growing this from seed naturally and are eager to try it using the winter sowing method. The earlier you can start your Marigold seeds will help you be better prepared to use Marigolds for pest protection in the spring. |
| Morning Glory | Annual | Morning Glory seeds need cold stratification, so they are a great candidate for winter sowing. We’ve had success growing this from seed naturally for our trellis system, though they are prolific once they get started, so be diligent in removing the flowers before they blow where you don’t want them. |
| Petunia | Annual | Although we haven’t intended to grow this plant, it did pop up in the garden last year from seed the year before. We might consider giving the winter sowing method a try. |
| Sunflower | Annual | We’ve had success growing this naturally from seed during the spring time. They grow pretty fast, so starting them using this method too early might require the plant to be transplanted somewhere inside the house until it is warm outside. We might give this method a try but beginning later in the winter season. |
| Celosia | Annual | Celosia has self-seeded for us in zone 7. Though, we are eager to try it using the winter sowing method to have plants blooming earlier. |
| Coneflower | Perennial | Coneflower seeds need to go through cold stratification to germinate which makes them a great candidate for winter sowing. |
| Milkweed | Perennial | Milkweed seeds require cold stratification to germinate. We were able to acquire some of these seeds to start a butterfly garden from the Lowe’s giveaway last year. We’ll be using this method to try our hand at using this method to grow them. |
How Many Milk Jugs will You Need?
It is really important to know how many milk jugs or containers you will need for winter sowing. How many milk jugs do you need for winter sowing? Answer: the minimal number of milk jugs needed will correlate to the number of cool weather plant varieties you plan to grow in the upcoming year. This may equate to one seed packet per milk jug. It makes sense that you will want to keep the plant varieties separated in their own milk jugs.
You can germinate several seeds of one variety in one milk jug which should be enough to meet the needs of the average garden. You may want to spread one seed packet of a given variety across more than one milk jug as this will provide the seeds with yet more room to develop. In any case, if there is a particular variety you need to grow more of, you will probably want to add additional milk jugs. You just want to plan to have enough milk jugs to meet your winter sowing needs.
When do you winter sow the seeds?
The earliest time that you might consider to winter sow seeds in milk jugs is on the shortest day of the year, which is on the day of the winter solstice (December 21). This is when the sun will take it’s most lowest and shortest path across the sky and during this time you will have the longest noon-time shadow when the sun is the lowest in the sky. The days following the winter solstice will gradually get longer with more sunlight with each passing day.
If you live in the south with milder winters, you might want to try sowing seeds at this time. If you live in the colder states, you might want to consider waiting until February or March. You want to be mindful of your growing zone and average winter temperatures so that you are not putting your jugs outside when they will end up frozen due to too many below freezing nights. You can check your growing zone on the USDA site here or find your location on the map below.

The goal with this method is to extend your growing season without bringing the containers back inside. You don’t want to have to perform any extra effort to insulate the containers in temperatures that are constantly freezing. The milk jugs do provide some insulation that will help extend your growing season, but only up to a point. This may require some trial and error in your area as well as contacting others in your area who practice winter sowing to find out what has worked for them.
Collect the Milk Jugs and Seeds
Collect the Milk Jugs. From the planning step, we determined what we intend to plant including the number of milk jugs we will need for the winter sowing of seeds for cool weather crops. This is a great use of your garden journal or planner and can be helpful to look back year to year to see how many jugs you used, rate of germination, and any other notes you may take. This step also begins in the fall as there is nothing like being in the middle of winter and scrambling to find milk jugs when the time is right for winter sowing.
Again, the planning and collecting steps should take place in the fall so that you can start collecting your milk jugs and containers as soon as possible. You may collect milk jugs from friends and the community, which is fine. You may check out some local Buy Nothing Facebook groups. For example, The Grow Monster family goes through about two milk jugs a week. If we start planning for this October 1st, and we decide to begin our winter sowing February 1st, we could reasonably have 32 milk jugs (4 months x 8 jugs a month) collected and available by February 1st.
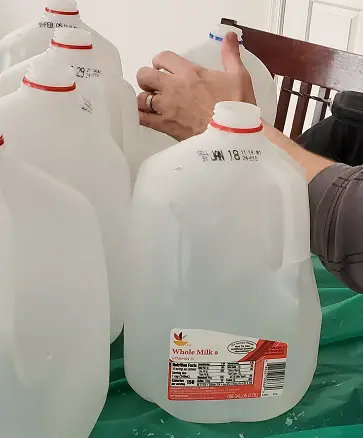
As you gather your milk jugs, you will need to make sure they are clean and sanitized. This includes running hot, steaming water in them and swishing them out to ensure there is no dairy residue or bacteria left in the jug. You don’t want to introduce any vectors for disease in the germination of seeds. It is better to be safe and make sure the jugs are adequately washed. This will ensure that the milk jug is prepared for cutting.
One important note when collecting milk jugs: you don’t need to save the caps!
Collect the Seeds. Just as important as collecting the milk jugs is the collection of the seeds themselves. Again, you don’t want to be ready for winter sowing and have no seeds to winter sow. You will want to get your seed sources lined up in the fall as you head in to winter.
There are really four sources you will need to turn to when acquiring your seeds:
- Source 1: This year’s harvest. If there is anything you’ve really enjoyed growing the previous year in your garden and would like to grow again over the next year, look no farther than this year’s harvest. Use those seeds to sprout the next generation of produce using the milk jug method.
- Source 2: Friends and Family. Another good source for seeds is from friends and family. Take the opportunity to bond with friends and family by exchanging seeds with them. Share your gardening plans with them to see if they might have any seeds available on your list and vice versa.
- Source 3: Seed Catalogs. When starting in the fall, most store retailers won’t have their seed displays out until spring time. If you don’t have a previous year’s harvest to rely on and friends/family do not have the seeds you are looking for, then you will need to turn to online or mail-in seed catalogs. They may be the best source for your seeds in terms of both quality and varieties you are looking for. Shipping times should also be relatively inline with when you intend to start your winter sowing.
- Source 4: The Store. We still throw this one in here in the off chance that a store will have some seeds hidden away on a shelf that you can purchase. These most likely will be dated for the previous year that just didn’t get sold. You are faced with lower germination rates the older the seed packet gets, but may still be worth a try if you are in a bind to collect seeds.
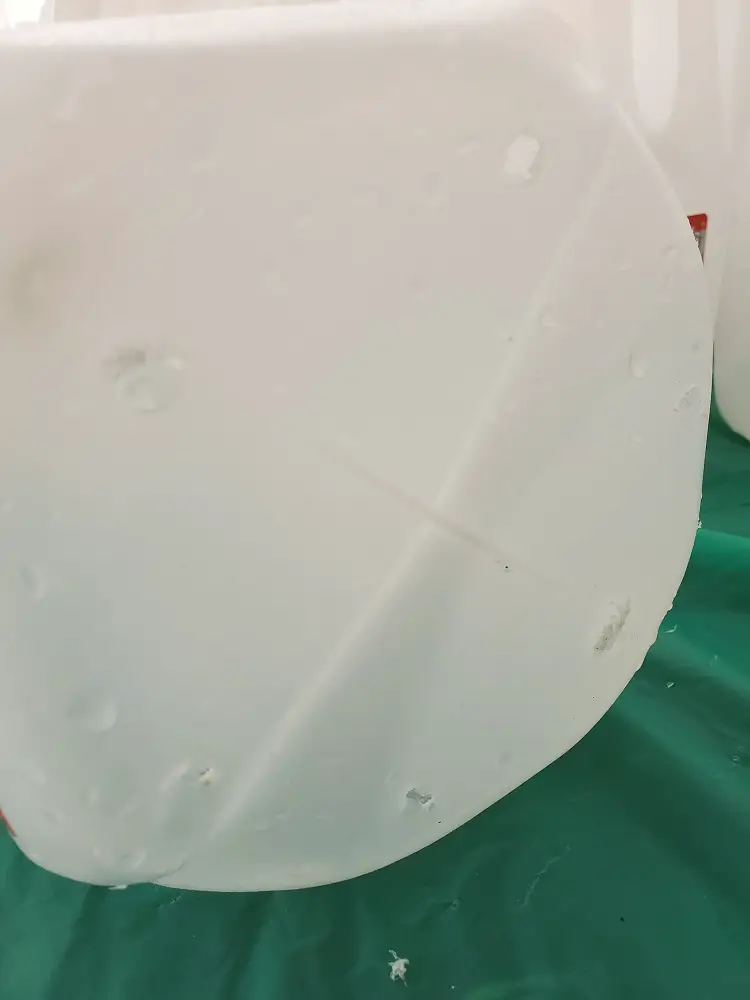
Add Ventilation and Drainage
Before you cut the milk jugs, focus on adding ventilation holes on the top and drainage holes on the bottom. The milk jug needs to remain as an open system. Let’s explore the reasons for why we want ventilation and drainage holes as it is easy to dismiss them if you haven’t seen what happens without them.
There are two reasons why you want to add ventilation holes to the milk jug:
- Reason 1: without ventilation holes, you will have some sunny days in late winter that will absolutely heat up the milk jug. If the heated air and moisture has no place to exit, you risk the inside temperatures and pressures increasing which will overwhelm the seedlings into a boiling, hot death.
- Reason 2: without ventilation holes, you will need to check on the jugs more often for water. There will be some days in early spring when it rains or snows. You will want your seedlings to at least acquire some of that extra water to stay hydrated by entering through the ventilation holes. Otherwise, you need to manually go out more often to check on the seeds to ensure they are adequately hydrated and water them.
The Grow Monster experienced what happens when ventilation holes were absent from a hoop house design where very few seeds germinated due to both over-heating and lack of water. You need to have the right amount of water in the soil when planting with containers.
The primary reason why you want to add drainage holes to the bottom of the milk jug:
- Reason: most plants do not like sitting in stagnant water. The roots need to exchange oxygen and carbon dioxide with pockets of air between particles in the soil. Yes, plants like and need water, but water needs to drain away and not pool in the soil. Soil should be moist, but not sopping wet or pooling in the container. One of the most common causes of house plant death is over-watering with inadequate drainage.
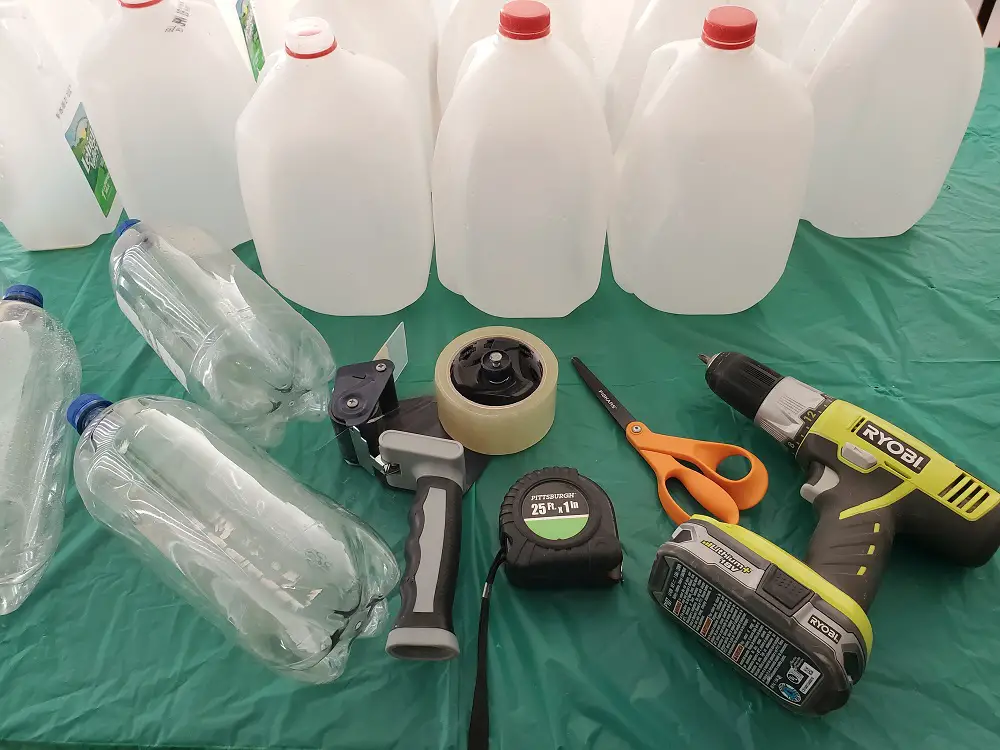
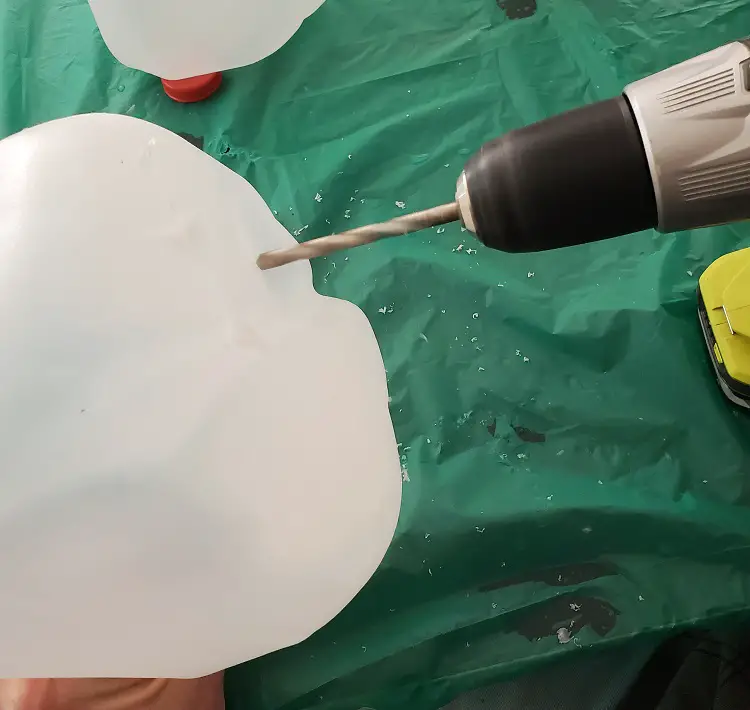
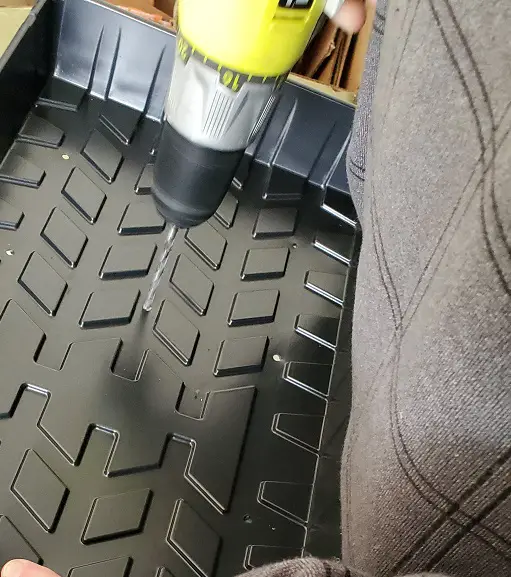
The Grow Monster has reviewed methods for creating holes and recommends one of three methods for adding ventillation and drainage holes to the milk jug:
| Method 1: Use hot glue gun | Method 2: Heated nail | Method 3: Drill with Drill-bit (preferred) |
| Description: This method utilizes the heat from a glue gun to melt a hole into the plastic of the milk jug. Toxic smoke from the burning plastic may be a by-product of this method, so you must do this in a ventilated area. | Description: This method utilizes the heat from a nail to melt a hole into the plastic of the milk jug. The nail is first placed over an open flame and then pressed gently into the side of the milk jug to create a hole. Toxic smoke from the burning plastic may be a by-product of this method, so you must do this in a ventilated area. This method also takes too long. | Description: This method utilizes a drill and a drill bit to create a hole in a milk jug. The Grow Monster prefers this method over the others so that you are not exposed to the possibly toxic smoke that is generated from the heated plastic. |
Cut the Milk Jugs
The next step in winter sowing is to cut your clean milk jugs. As there are many ways to skin a cat, there are also many ways to cut a milk jug for the winter sowing method. Cutting the milk jug enables easy access to the soil and sowing of the seed evenly inside the milk jug. The popular method for winter sowing require the cutting of milk jugs along with a requirement to have a hinge and sealed with duct tape.
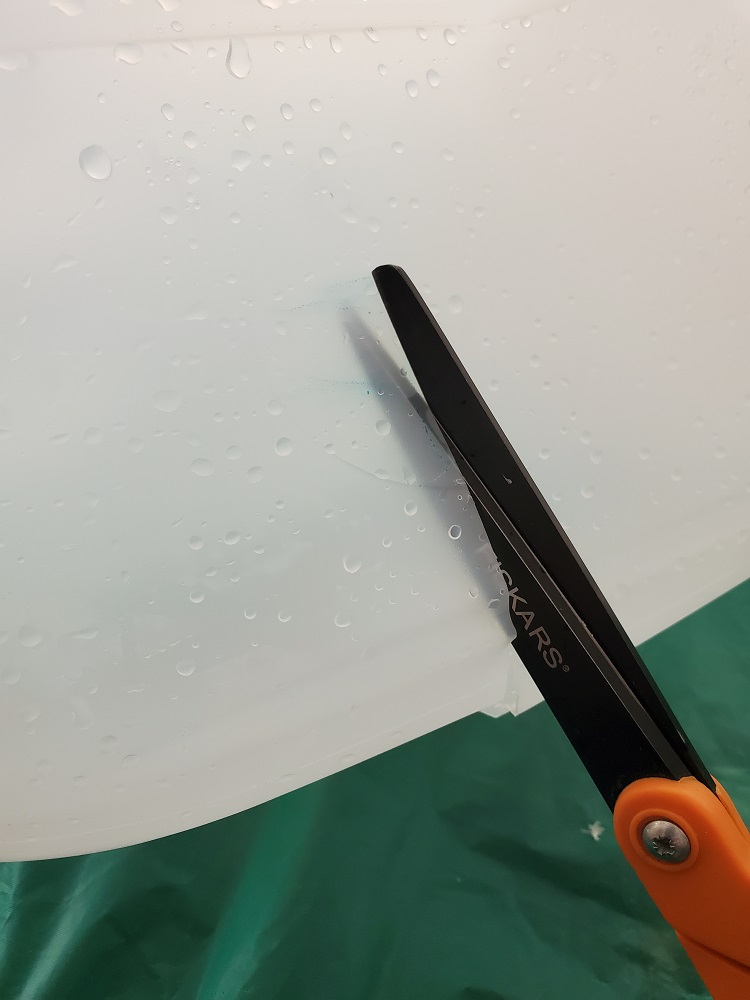
The Grow Monster will illustrate two ways to cut the milk jug with the hinge/duct tape requirement as well as introduce a third way to cut the milk jug requiring no hinge at all. You can choose which method best works for you.
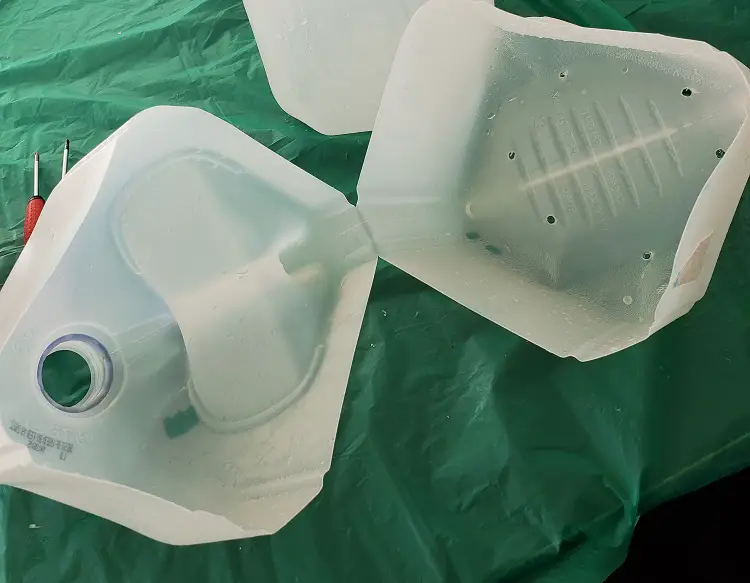
| Method 1: Corner Hinge / Duct Tape | Method 2: Backside Hinge / Duct Tape | Method 3: No Hinge Required |
| Description: The milk jug is cut around most of the perimeter with exception to one corner (containing the handle) of the jug. This small uncut corner creates a hinge for opening and closing the jug. Duct tape is required to keep it shut with this design. | Description: The milk jug is cut on three of the four sides of the jug. The uncut side of the milk jug creates a hinge for opening and closing the jug. Duct tape is required to keep it shut with this design. | Description: The milk jug is cut on all four sides around it’s perimeter. This cut creates two separate pieces (top and bottom) of the milk jug. No hinge is created as the two pieces are intended to slide tightly together. Duct tape is required to keep it shut with this design. |
Add Soil to Milk Jug
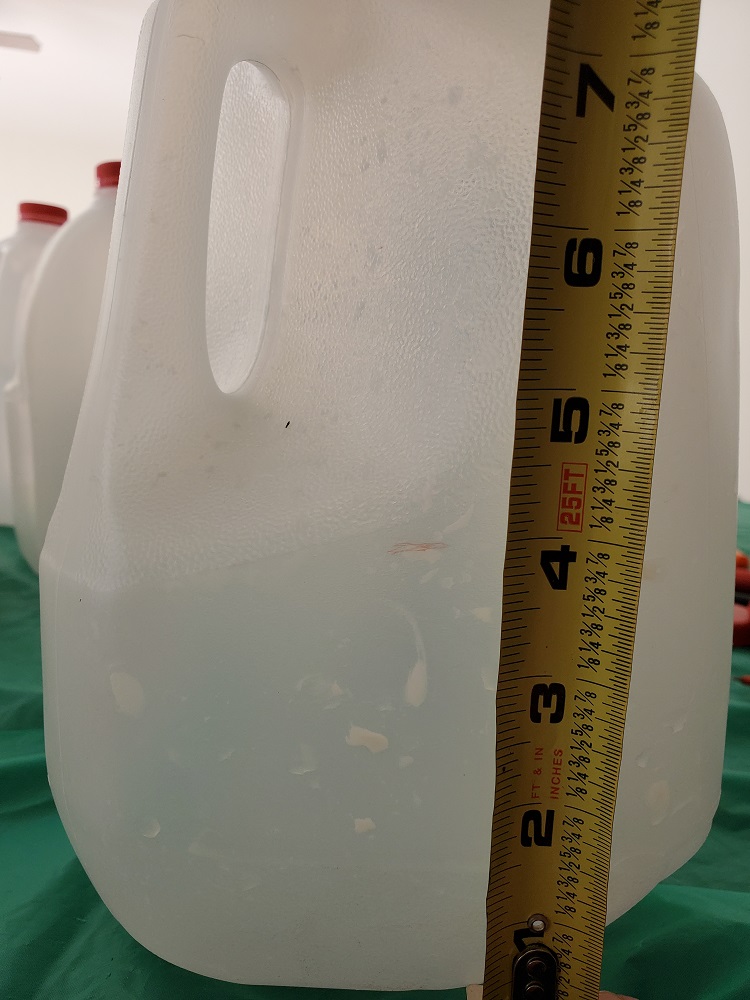
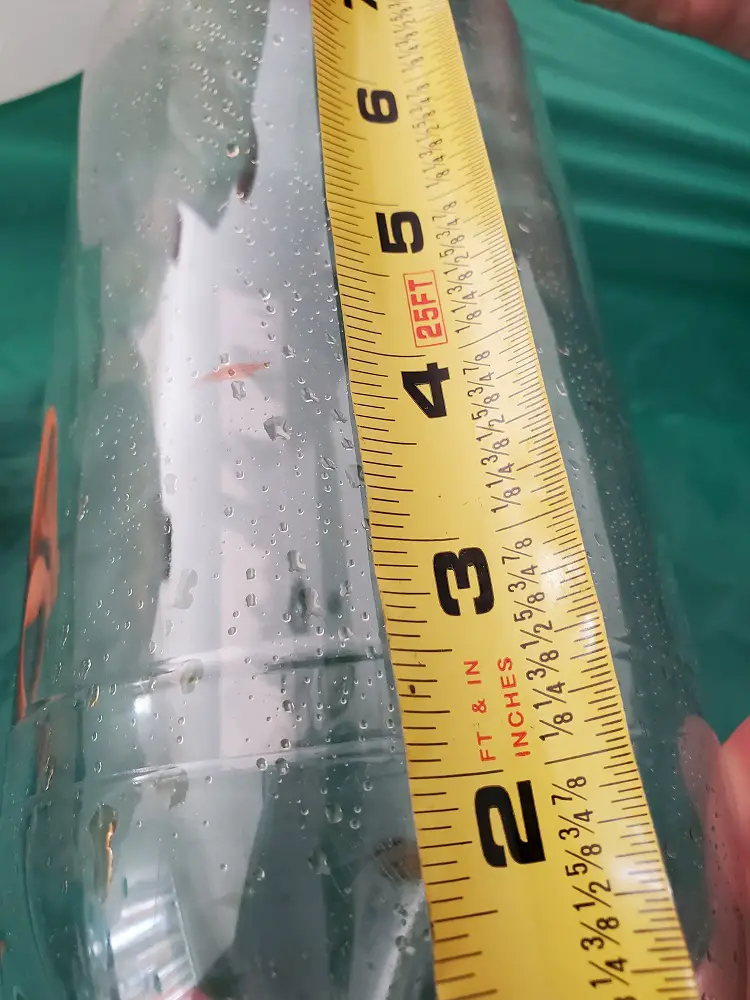
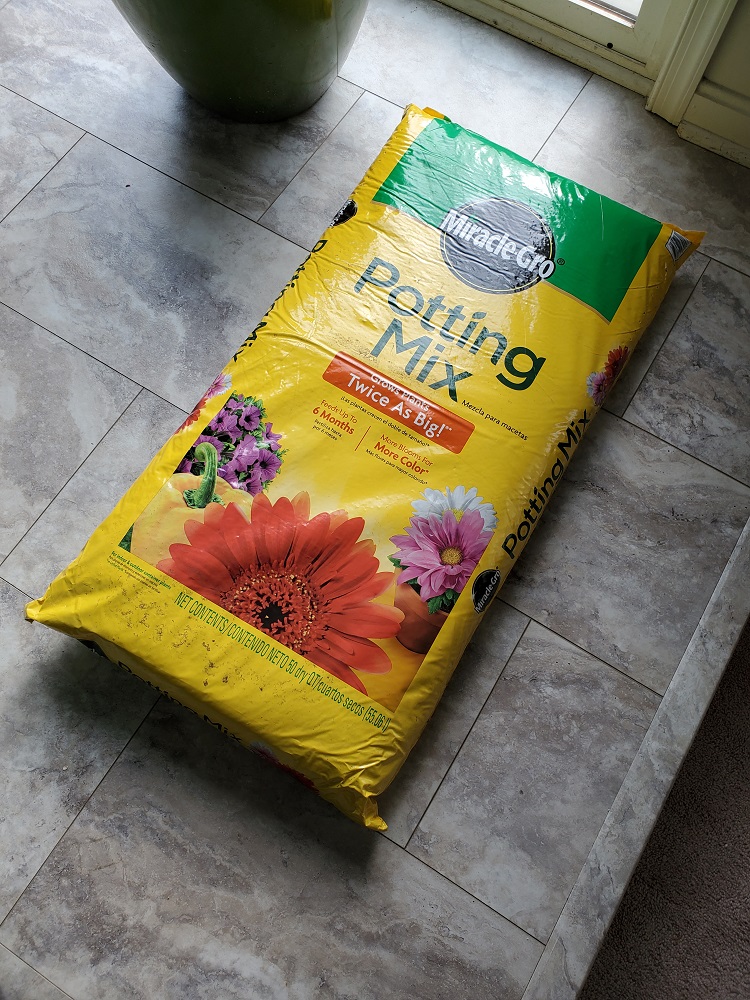
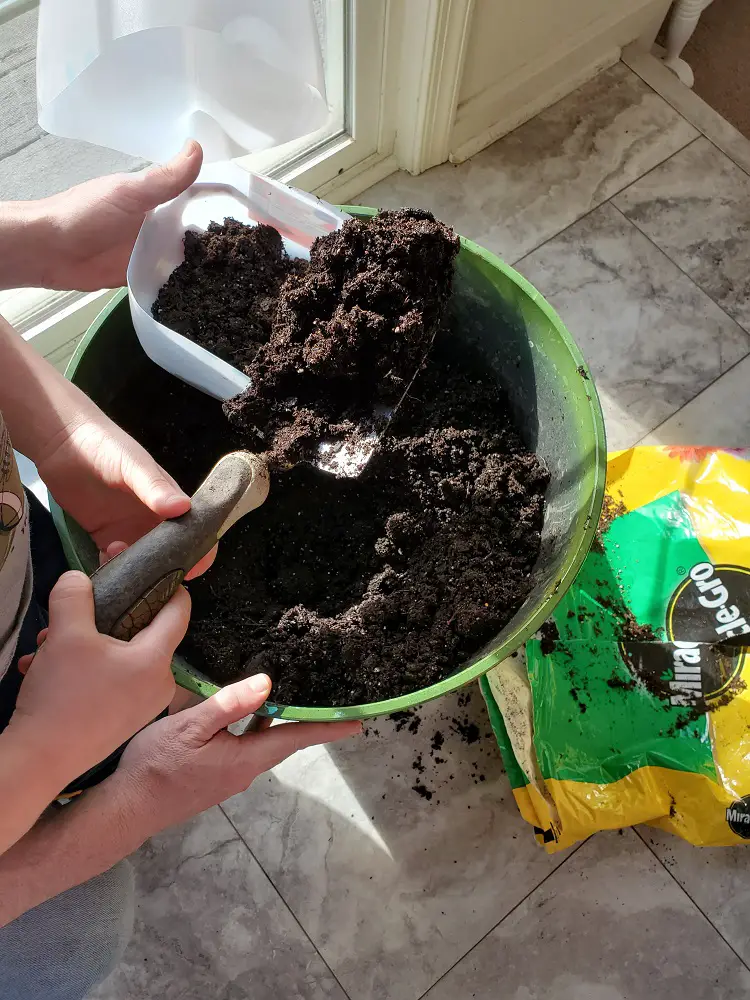
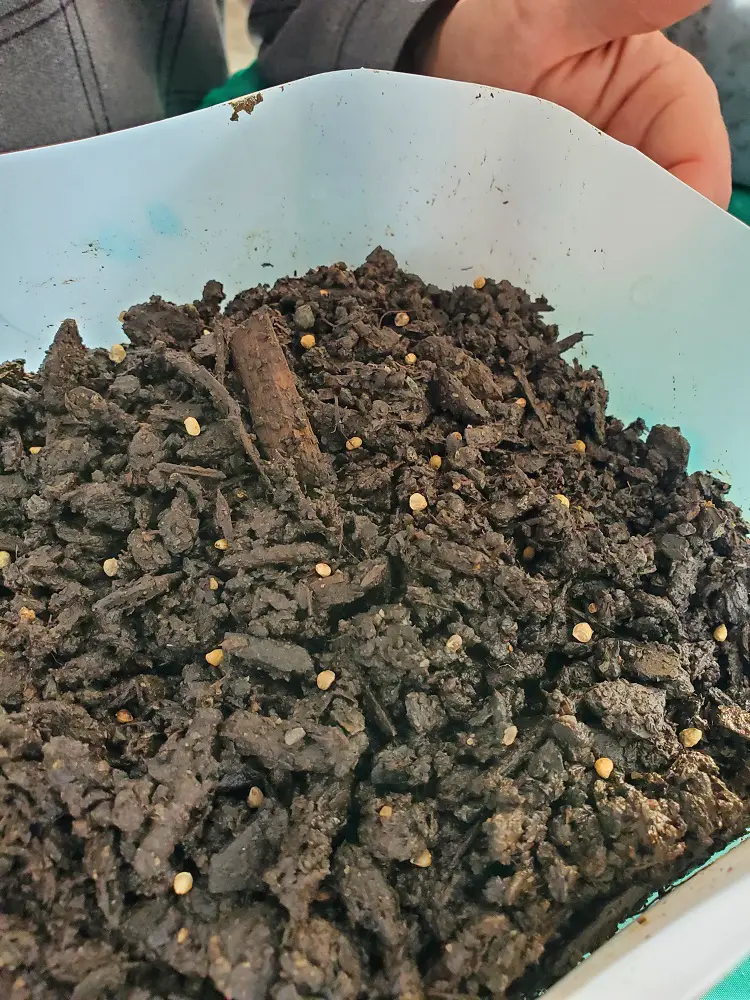
With the milk jugs cut, ventilation and drainage holes added, and seeds gathered you are now ready to add soil to the milk jug. You will need to fill the jug with about 3 inches of soil. Preferably, use a potting soil that has first been sifted to remove any of the larger particles such as rocks, twigs, or bark. Seeds that germinate on these larger pieces have no foundation for growing further and will die.
Aeration and drainage are also important so ensure that your potting soil includes some degree of perlite (the white particles), vermiculite (metallic-looking flakes), and/or sphagnum moss (light puffy brown soil). The perlite provides aeration by allowing the moisture to flow through the soil around the other particles whereas the vermiculite and sphagnum moss assist by retaining moisture several times their own weight. Sphagnum moss also will hold onto nutrients from the soil around it and distributes the nutrients to the developing roots as they need them.
Check out this article if you’d like to learn the differences between using perlite and vermiculite and which situations you might prefer one or the other when winter sowing.
You don’t want your soil to be plain dirt. Using just plain dirt/clay soil will compact easy and just gets more compacted over time. Compaction prevents the flow of air, water, and nutrients to plants both old and young. Amending the soil with perlite, vermiculite, or sphagnum moss will ensure the soil will be aerated, hold moisture and give the roots of new seed sprouts an opportunity to establish quickly and deeply into the soil. You could also add compost to your soil, read this article about the different ways to compost if you’d like to learn more.
Sow Seeds, Add Water, and Label Milk Jug
Now that the soil is in the milk jugs, it is time to sow the seeds. Based on your plan, you may have intended to use one milk jug for each packet of seeds. You could stretch one seed packet across two milk jugs or more if that was what was planned.
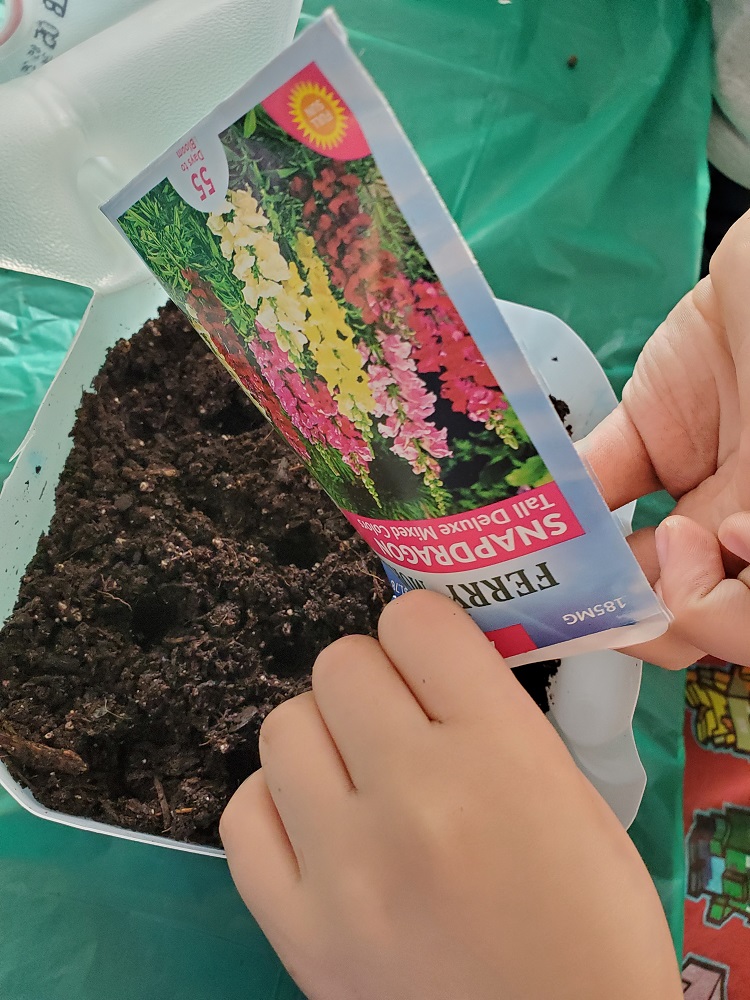
Place Seeds onto Soil
This is the fun part. Time to open your seed packet. Distribute your seeds evenly over the surface of the soil and be sure to keep within a half-inch margin from the side of the milk jug container. You don’t want seeds to fall between the side of the container and the soil where they might not come in contact with any soil to germinate.
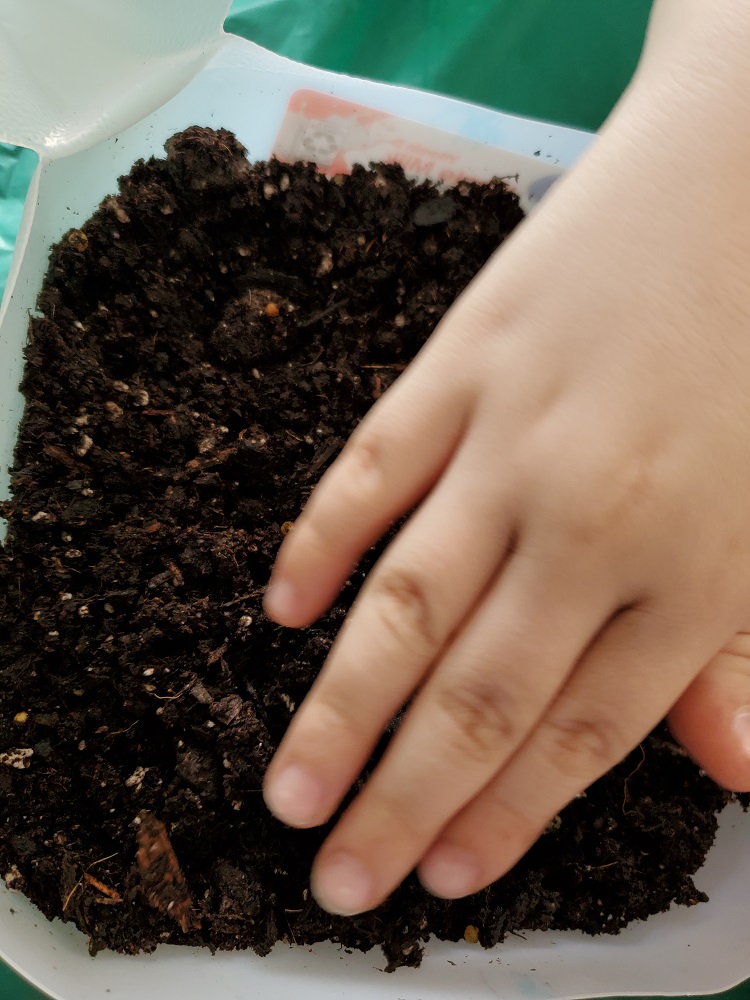
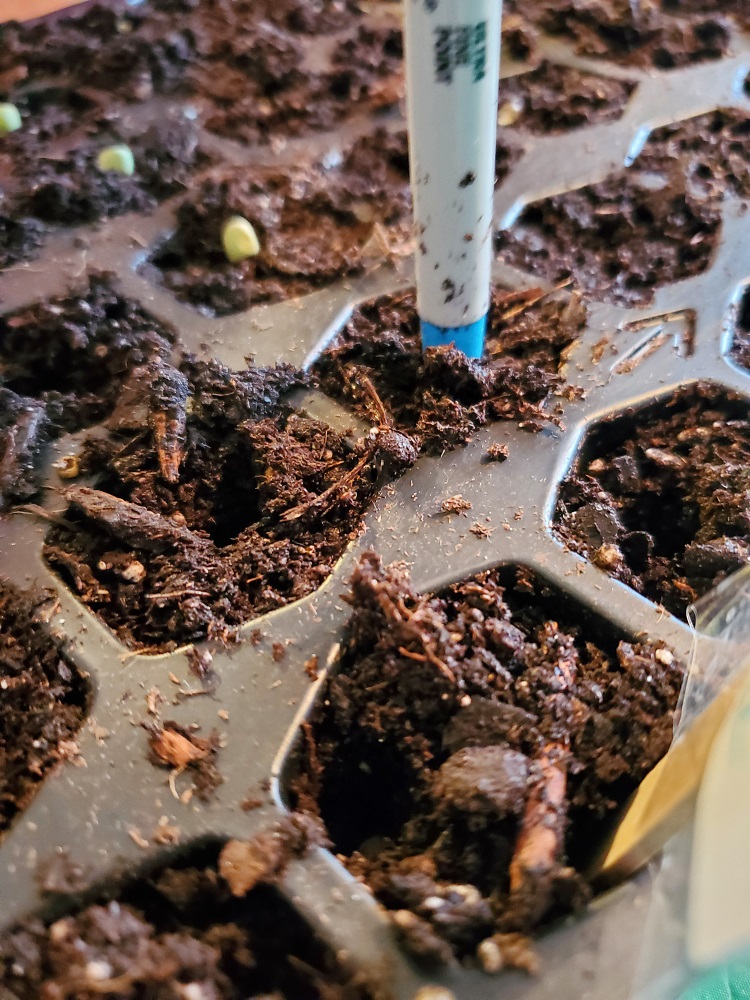
Work Seeds into Soil
Review your seed packet for planting depth instructions of the seeds. Go back over the area with a pencil and work the seeds into the soil according to the depth that is recommended on the seed packet. This ensures that the seeds have come in contact with the soil and are well insulated. What you will ignore on the seed packet for winter sowing is the seed-spacing requirement, because this method is focused only on getting the seeds started. You will pay attention to the seed spacing requirement when you transplant during the ‘Transplant Seedlings’ step in the spring.
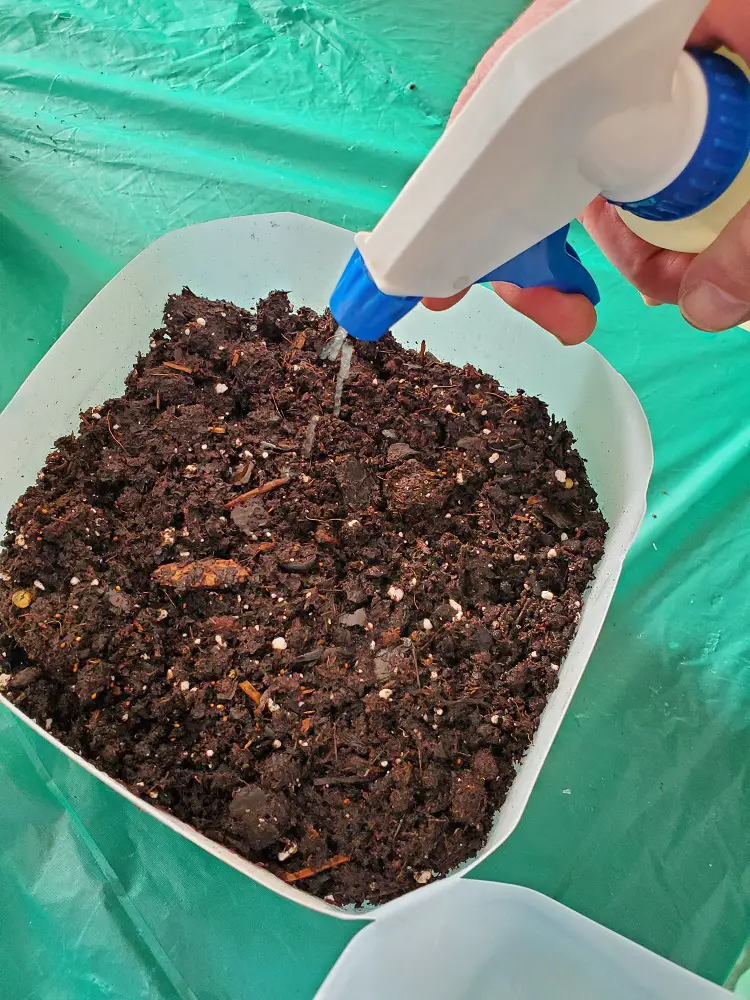
Spray with Water
With the seeds worked into the soil, you will now want to add just enough water to the surface of the soil so that it is evenly moist, but not sopping wet. You do not want the seeds to drown in water. It is recommended that you use a spray bottle for this so that the water is distributed evenly over the soil and that moisture penetrates the first inch of soil.
Close the Jug
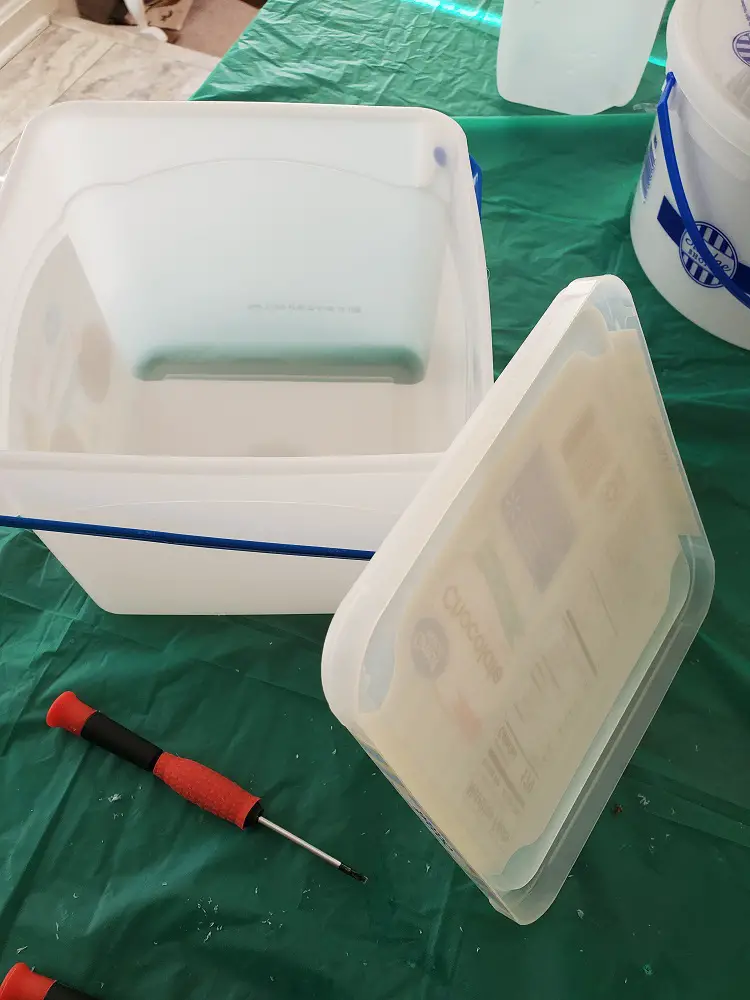
With the seeds sown and watered the jug needs to be closed. The milk jug needs to be closed with the cap off. This adds in aeration for the milk jugs to make sure the soil doesn’t get too hot or soggy and water can still enter through snow or rain. Depending on your milk jug design, you can use duct tape to close the the milk jug. If you are using other containers, you may keep the lids on but drill holes to aid in aeration and watering.
Label Milk Jug
It is important to be able to track milk jugs and know what is growing in each of them. The Grow Monster has done this before where we planted something in a container, but forgot to label it. It is important to label, otherwise it becomes a mystery as to what is growing in the container and you won’t know what you have until spring or summer when it bears fruit.
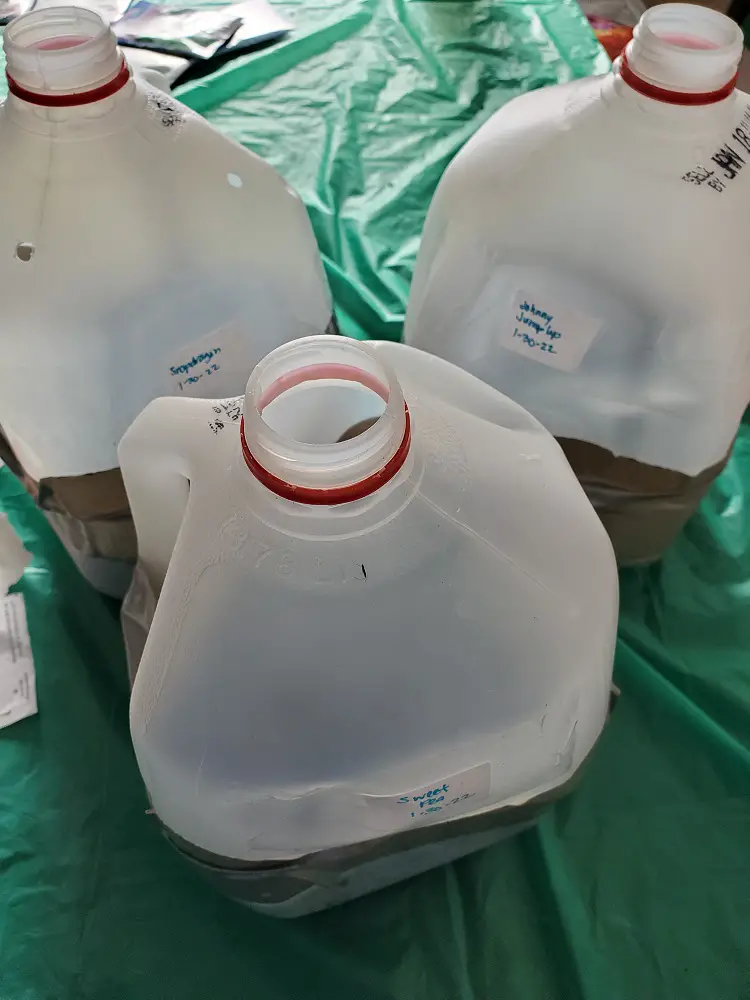
With a sharpie marker, label a piece of paper with the seed name and date sown. Alternatively, you may choose to be creative and print the labels out on printer paper. As long as the jug has a label. This is the next important part: find clear packaging tape. The wide, clear, water-proof properties of packaging tape will keep your label dry and prevent the ink on the label from bleeding from the outside elements. Where you place the label will also depend on your milk jug design.
| Method 1: Corner Hinge / Duct Tape | Method 2: Backside Hinge / Duct Tape | Method 3: No Hinge Required |
| Label Location: Place the label on the top portion of the milk jug. | Label Location: Place the label on the top portion of the milk jug. | Description: Place the label on the Bottom portion of the milk jug. |
Place the Milk Jugs Outside
Once the milk jugs have been sown with seeds, watered, and labeled, it is time to place them outside. For people living farther north, placing the milk jugs on the south side of the house with southern sun exposure during the day is recommended. However, the farther south you go, putting the milk jugs in either a south-east, south-west side, or south-side with partial sunlight might be the better option.
At least in zone 7, we get some warmer winter days and having the milk jugs in direct southern sun exposure could potentially be too much for them. We risk the jugs retaining too much heat and evaporating all the moisture during those days. The farther into spring we go with sprouts and plants, they could be outright cooked. This would require more daily attention than we want, so we will be putting them on both the south-east side where there is not as much direct sun along with the south-side on the deck with partial sunlight.
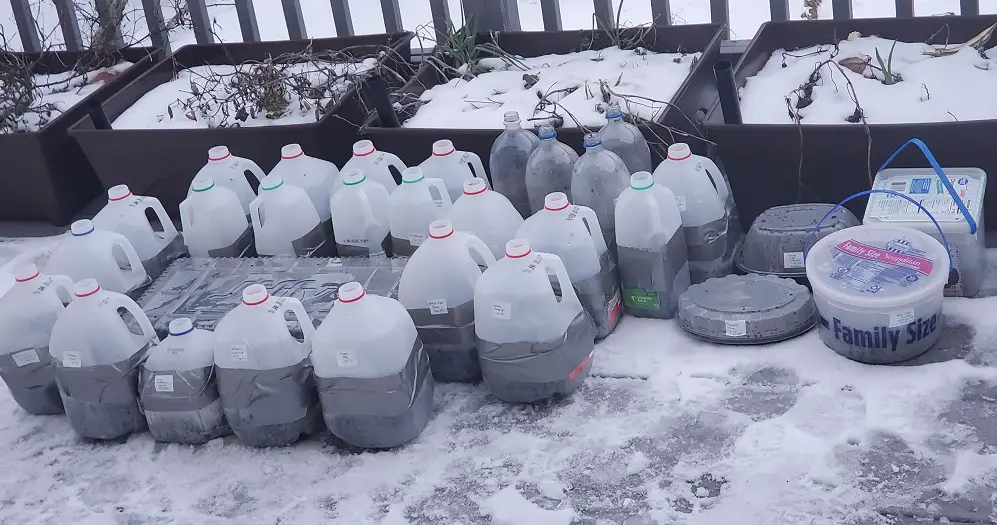
At this point, it comes down to finding that sweet spot location where you are able to get just enough sunlight, insulated with just enough heat, while retaining the moisture level inside the milk jug.
Monitor the Milk Jugs
As a reminder, this method is not a set-it-and-forget-it process as many might suggest. The goal of winter sowing is to extend the growing season by germinating the seeds a bit sooner. Just like farmers watching over their fields, we still need to monitor the milk jugs throughout the process. There are some things we need to be doing daily, weekly, after the last frost, and before/after storms.
| Daily | On a daily basis, do a quick walk around to ensure the milk jugs have not been disturbed and that lids are not opened. Depending on your location, neighborhood animals may attempt to access the milk jugs. A cat can make a mess of things if they misinterpret the milk jug for a litter box. A dog could grab the milk jug by the handle and tow it around the yard like a toy. Sometimes kids get curious as well, so it is important to be mindful, and do a quick walk-through each day to make sure all is in order. |
| Weekly | On a weekly basis, look at the side of the milk jug and check to gauge the moisture of the soil. If the soil looks dry and you don’t see condensation on the insides of the milk jug, provide a light spray from the top to ensure the first one inch of soil is ‘moist’ but not sopping wet. If seeds have sprouted and matured past their first true leaves, you can go from spraying to pouring a cup’s worth of water evenly around the container as the water requirements for the seedling increases with it’s development. Look to see that any plant growth is not touching the top or sides of the milk jug as this might indicate a need to go to the next step: ‘Transplant Seedlings’. Note: no weekly check or additional spray is needed if you are still in the early winter months with daily freezing temperatures. |
| After the Last Frost | After the last frost in your area, check the milk jugs for additional ventilation. Many green houses have both manual and automated means of controlling temperatures and humidity in much the same way. Depending on your location, spring days can get pretty hot. If you get an unusually hot day in spring, consider opening the milk jug during the day and putting it back on at night. You may also need to spray it with some additional water during those days. If seeds have sprouted past their first true leaves, then you need to start considering the next step: ‘Transplant Seedlings‘. |
| Before Storms | Check the drainage holes to ensure they are not blocked so the milk jugs do not flood with rain or snow water. Even though the milk jugs have drainage, you don’t want a deluge of water in the container if you can help it. |
| After Storms | Check the state of the containers after storms. It is okay if the containers are buried under snow assuming the containers were closed up before the event. Check to make sure there was no wind or rain damage to the containers. Things may have blown around or spilled during the storm. The sooner you know of the damage, the sooner you can act to remediate the damage and not lose the seedlings. |
Transplant Seedlings
At this point you should be past your last day of frost. Seedlings have sprouted past their first true leaves and you now need to start considering the idea of transplanting them. There is the question of when ‘could‘ versus when ‘should‘ the seedlings be transplanted from the milk jugs?
When could you transplant the seedlings from the milk jugs?
Seedlings could be transplanted from milk jugs as early as after developing their first true leaves. However, at this stage their stems and root systems are still very delicate. You will need the patience and skill of a surgeon to remove them carefully from the root ball and transplant them to their final destination.
Not that it isn’t possible and that you are not up to that challenge, but the risk is much higher to damage and lose them in the process. If you can do it carefully and successfully, you stand to gain more plants in the end. Likewise, if you do not do it carefully and they don’t take well to the transplant, you stand to lose more plants in the end.
When should you transplant the seedlings from the milk jugs?
Seedlings should be transplanted before their leaves start to touch the sides and/or top of the container. What you will notice when the leaves start touching the sides/top of the container for any extended amount of time is that they will start to ‘burn’. In other words, those leaves in contact with the surface will wilt from the surface heat of the milk jug. At that point, you will know they have extended their welcome, and must move along into the garden.
If you’ve started sunflowers with the winter sowing method, check out this post explaining how to transplant sunflowers.

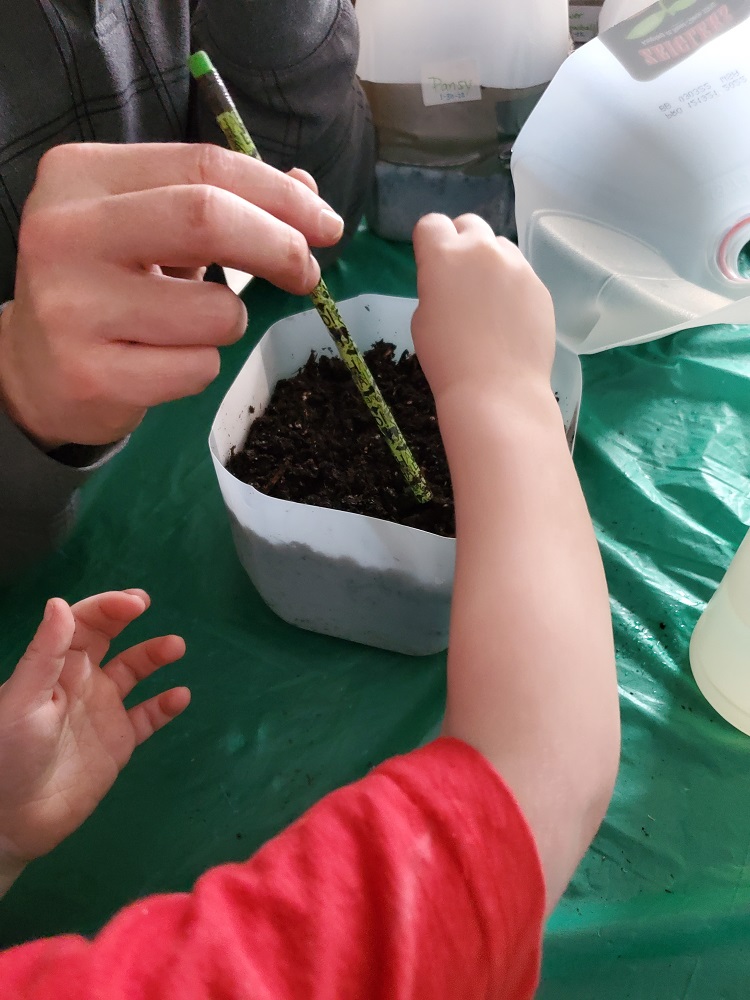
Activities with Children
Winter sowing is a great activity to do with your children! Every part of this can get your children involved. They can even pick out their own seeds and tend to that milk jug and watch them grow over the winter. You will need to note that it does take longer with children, but you will be building great memories that they will remember for years to come. Bonus benefit is getting your children to appreciate gardening!
Final Thoughts
Many people tend to start thinking about their garden during the winter and really want to get planting again. But, winter temperatures can really impact our ability to grow things outside during the colder months. Winter sowing is a great way to bridge the gap between disassembling your garden in the fall and restarting in the spring. If you follow this guide, you should be well on your way to having a robust and healthy set of seedlings to re-start your garden space in the spring. While not all seeds can be sown in the winter, there are a lot that can- experiment to see what will work in your area.
For those seeds that might not work well for winter sowing, read this article to see how to quickly and easily germinate seeds indoors using plastic bottles.