At The Grow Monster, we believe that a compost bin is an important part of any garden. The main function of the composting bin is to facilitate the breakdown of materials into a rich soil that contains the micro organisms necessary to help your garden plants grow. The composting process is a delicate combination of carbon, nitrogen, oxygen, water, and microorganisms coming together to create what is affectionately known as soil, or “black gold”. In this post, The Grow Monster will explore some of the most popular ways to compost along with the pros and cons of each design option.
The most popular ways to compost used in today’s suburban gardens:
- A Plain Ol’ ‘Compost Pile’
- Wire Mesh Compost Bins
- Wood / Composite / Vinyl Compost Bins
- Compost Tumbler Bins
- Garbage Can Compost Bins
- Vermiculture (worm) Bins
- The Hybrid Bins
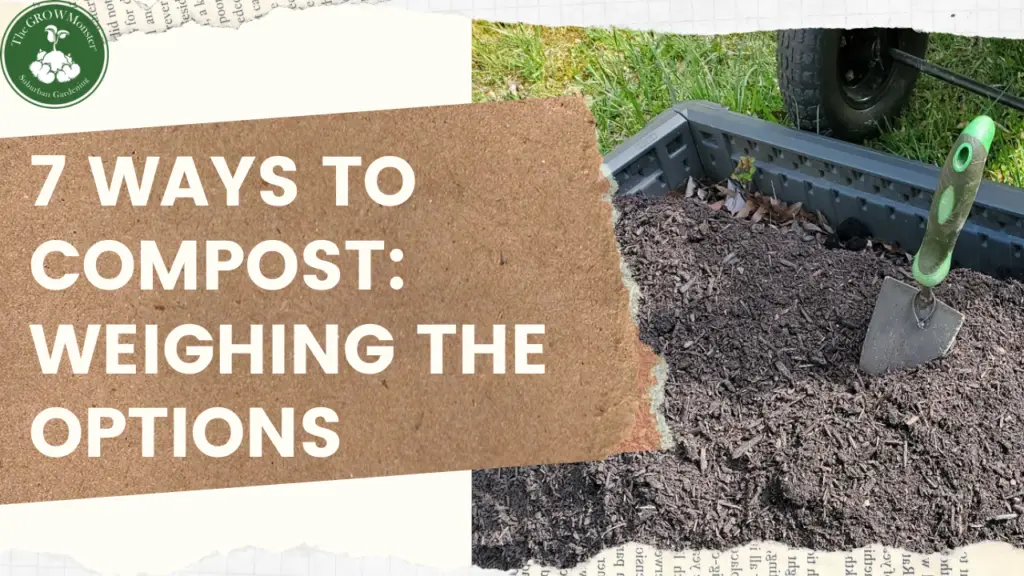
1. A Plain Ol’ Compost Pile
We’ll begin with the cheapest and most convenient design option for the suburban gardener: a plain ol’ compost pile. This option requires no additional material at all other than the materials to be composted. This is often placed in a discrete corner of the yard where composting materials could be left for composting. They say the optimal pile for composting should be no less than three feet in height, and three feet in length and width. This helps establish a reactive ‘core’ for maintaining the composting process where the pile can begin composting from the inside-out.
Pros: This design provides for excellent air flow, and provides easiest access to the materials for turning with the use of a shovel, rake, or pitch fork. You can also visually see the progress being made in the composting. This design provides for the largest volume of materials to be composted as it is not restricted by the size of the container (bin) these materials are placed in.
Cons: This design -visually- may not work in a suburban setting as there may be Home Owner Association (HOA) guidelines forbidding the existence of open compost piles on your property. You might want to consider one of the alternative design options mentioned below. This option does require the periodic manual turning of materials and visits to check that adequate moisture is being maintained.
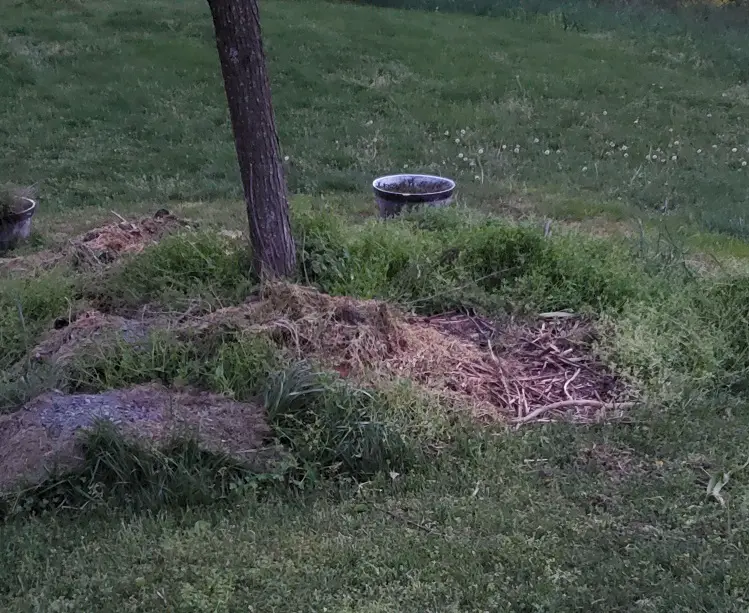
2. Wire Mesh Compost Bins
The common material used in this design is the ‘wire mesh’ fencing. When we say ‘wire mesh’ this includes both metal and plastic materials that have been crossed into a mesh and often used for fencing projects. There is a host of materials available including galvanized before weave (GBW), galvanized after weave (GAF), vinyl coated, stainless steel and other fencing alloys. Fencing includes chicken wire and cattle panel fencing. It could be used on its own or in conjunction with a supporting wood frame. When used by itself, the wire mesh compost bin may be cylindrical in nature and stand on its end. When used with wood, they may be more rectangular in nature.
Pros: This design provides for excellent air flow, and you can visually see the progress being made in the composting.
Cons: This design is difficult at retaining the level of moisture required to easily sustain the composting process. You will need to actively visit the bin daily to water in order to maintain its moisture for the composting reaction to occur. This design may also restrict your ability to turn the pile where the tines of the pitch-fork could easily get caught up in the mesh. Like the ‘plain ol’ compost pile’ design option, this option might not meet the standards established by your HOA.
3. Wood / Composite / Vinyl Compost Bins
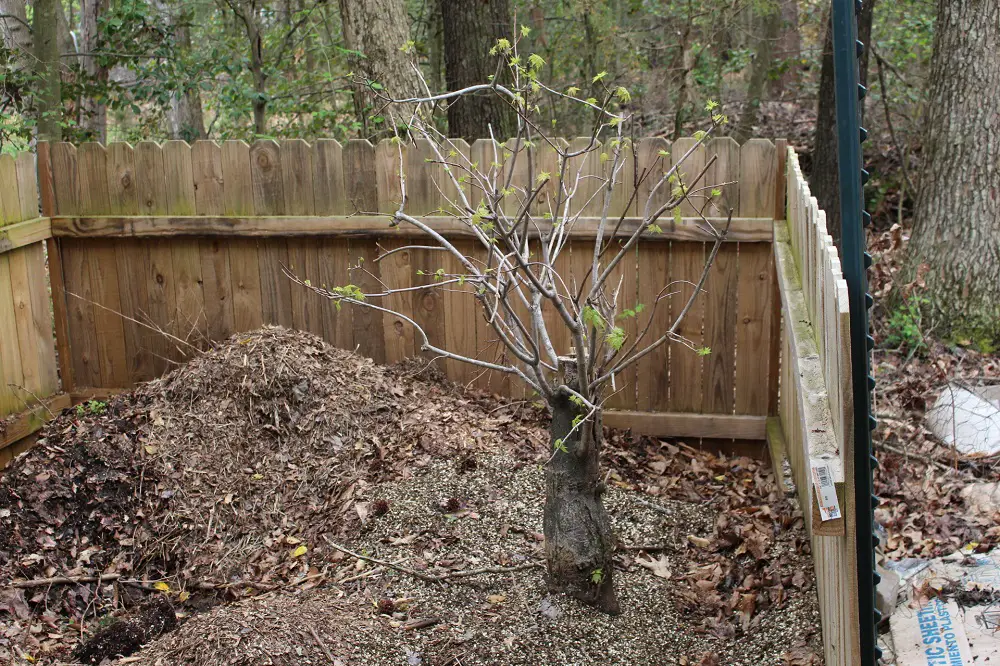
Wooden Fencing panels used to create a compost bin. 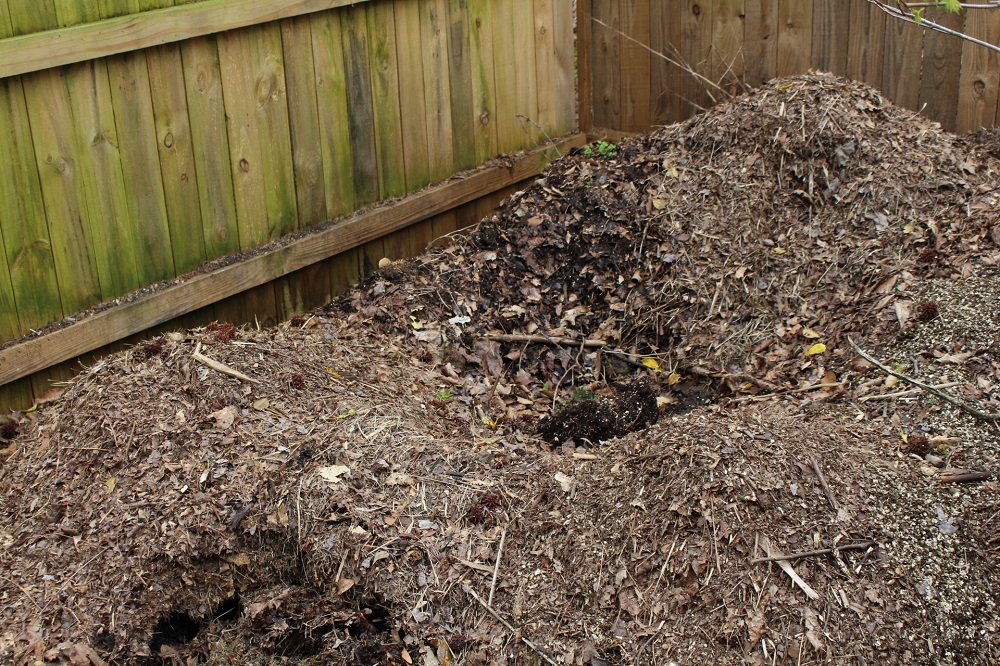
Compost built up in a wooden compost bin.
The common material used in this design is the ‘wood’ ,’composite wood’, or ‘vinyl’. This may include regular lumber (not recommended), treated lumber, treated wood lattice/fencing, vinyl lattice/fencing, composite wood, or wood obtained from pallets. These designs for the most part are rectangular in nature, may have one side open, or be completely closed with a lid.
Pros: The use of this material provides for flexibility in the aesthetic design of the bin itself. Especially in residential areas where composting needs to be done discretely according to HOA policies. When using composite / vinyl materials, the structure should be expected to last for a considerable amount of time. Those designs that are closed and include a lid are able to retain the moisture necessary to sustain the composting reaction.
Cons: This design may be costly when vinyl or composite wood is used. The closed version of this design does make it difficult to turn the compost and promote airflow so the design should include adequate ventilation to maintain this airflow. When using wood from pallets -unless it is painted / treated – this wood will begin to break down with the compost over time. Note that some wood pallets are treated with chemicals that may be considered harmful. Pressure-treated lumber (the greenish kind) in general does contain pesticides (arsenic) and may leach into the compost or garden beds over time. It would be best to use pressure-treated lumber for flower beds and landscaping versus being used for beds containing vegetables consumed by the family. Another note: do not burn this lumber as it will contain condensed amounts of the poison(arsenic) in the smoke and ashes. Also, any wood materials -treated or not- are susceptible to carpenter bees (if they are in your area).
4. Compost Tumbler Bins
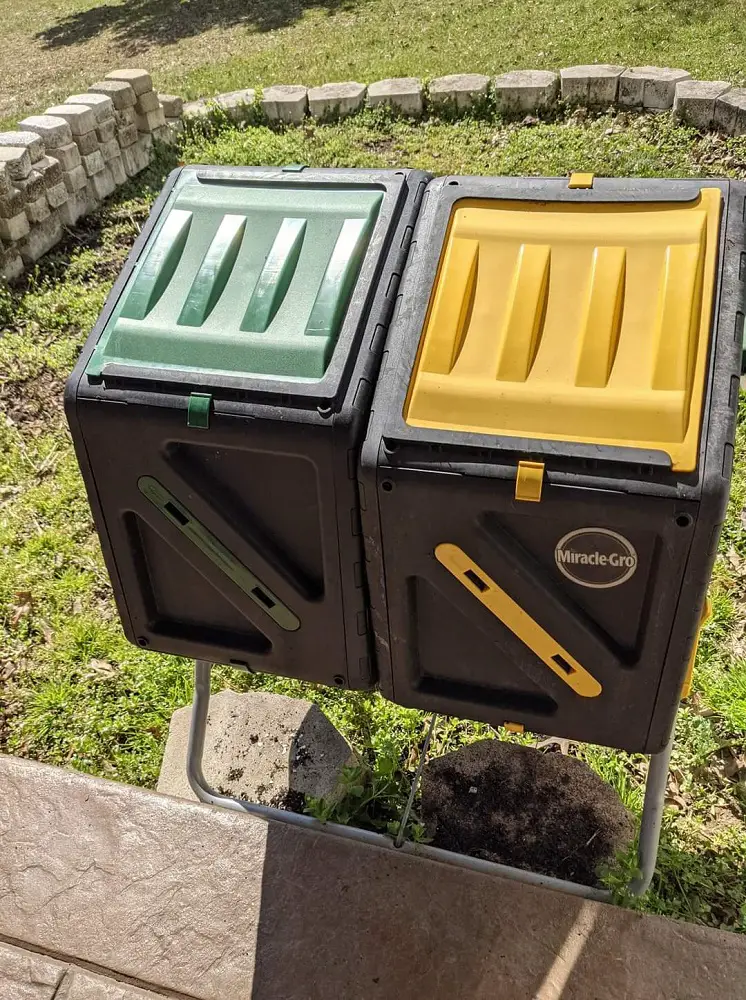
The common material used in this design is either a cylindrical metal or plastic container. Some containers have holes for airflow, whereas other containers do not. There is generally a door to place compost materials which is then shut and secured. It is expected that the tumbler is manually rotated on its axis periodically by the owner to mix these materials until composted.
Pros: This design provides an easy mechanism for turning compost and retaining moisture. If holes are present, this design will also provide adequate air flow for oxygen to feed the composting reaction.
Cons: This design is limited by the ‘size’ of tumblers available in today’s market. You face filling up the tumbler to capacity and having to wait a considerable amount of time before being able to use it again. You might need to buy multiple tumblers to meet your composting needs. Check the current price for compost tumblers here on Amazon. If holes are not present in the tumbler and you go long periods of time, the tumbler will begin composting using an anaerobic process with microorganisms that do not require oxygen. The byproduct of this process is methane gas as well as a messy sludge to clean up when it comes to emptying the bin. This creates a rather putrid ‘smell’, which might get the neighbor’s attention.
5. Garbage Can Compost Bins
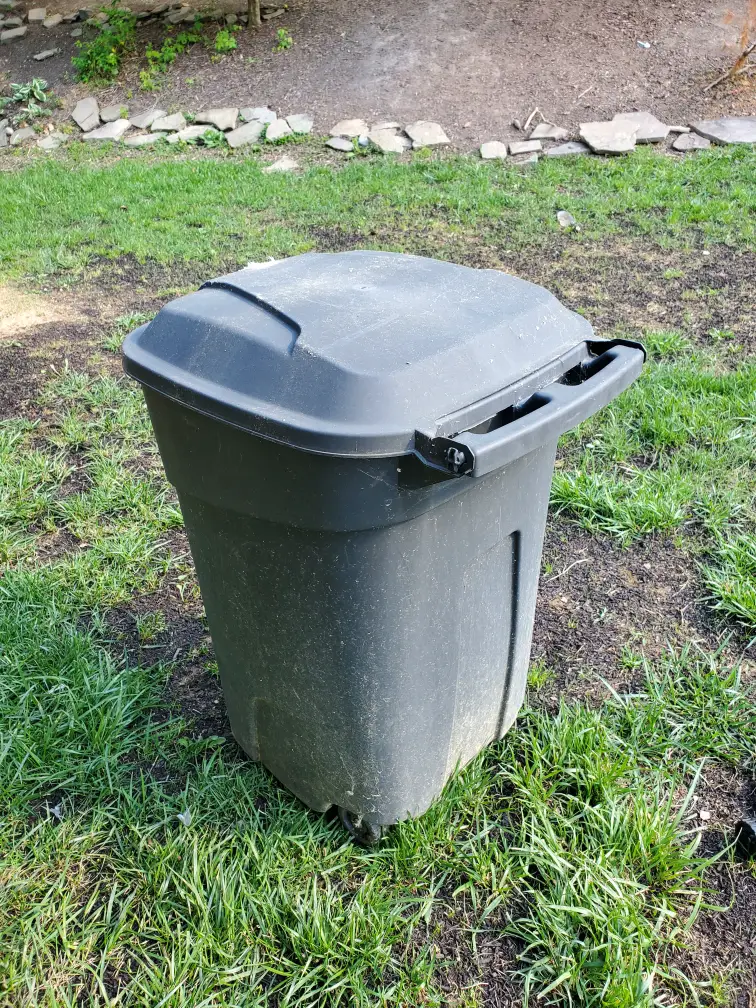
The common material used in this design is the ordinary garbage can. It could be metal, but in most cases today are generally plastic and come in many shapes and sizes. One could also use larger plastic storage bins as well, though larger garbage cans are definitely preferable over smaller. What is important with the garbage can composting bins are the holes. You will want to have enough holes to promote good air flow to feed the composting reaction, but not to have so many holes that the moisture is lost. With garbage can compost bins, make sure to include at least one hole at the bottom so that water doesn’t build up and promote a smelly, anaerobic composting process. You can even be creative and add a water spigot to the hole. When adding water to the compost, you may use this hole (or spigot) to collect the extra water aka ‘compost tea’ which can be used as a fertilizer when watering plants in the garden.
Pros: This design may be the most affordable and convenient option for the suburban gardener. It provides for excellent air flow when it has holes. If the garbage can has wheels, this makes it easy to move the compost bin around the yard where it is needed when it is to be filled or emptied. Also on the plus side, the garbage can compost bin provides the gardener with the opportunity to collect ‘compost tea’
Cons: This design, like the tumbler, is also limited in the amount of compost that can be generated and managed. So having more than one garbage can compost bin might be in order. Another issue with this method is the ability to easily turn the compost. It would require getting a shovel or pitch fork into the container periodically to turn materials over, otherwise compost might generally take longer. In this design, when using the bottom hole (or spigot) to collect the ‘compost tea’, you will need to place the compost bin up on a platform in order to collect the ‘compost tea’. This may require building a small ramp/platform in order to do this. The more water that is placed in the compost bin, the heavier it gets (but also the more compost tea you get in return depending on how far the last set of holes are from the bottom of the bin.) If the tea sets in the bottom of the container for too long, anaerobic composting processes will set in and cause the tea and compost bin to ‘smell’. Just be mindful.
6. Vermiculture (Worm) Bins
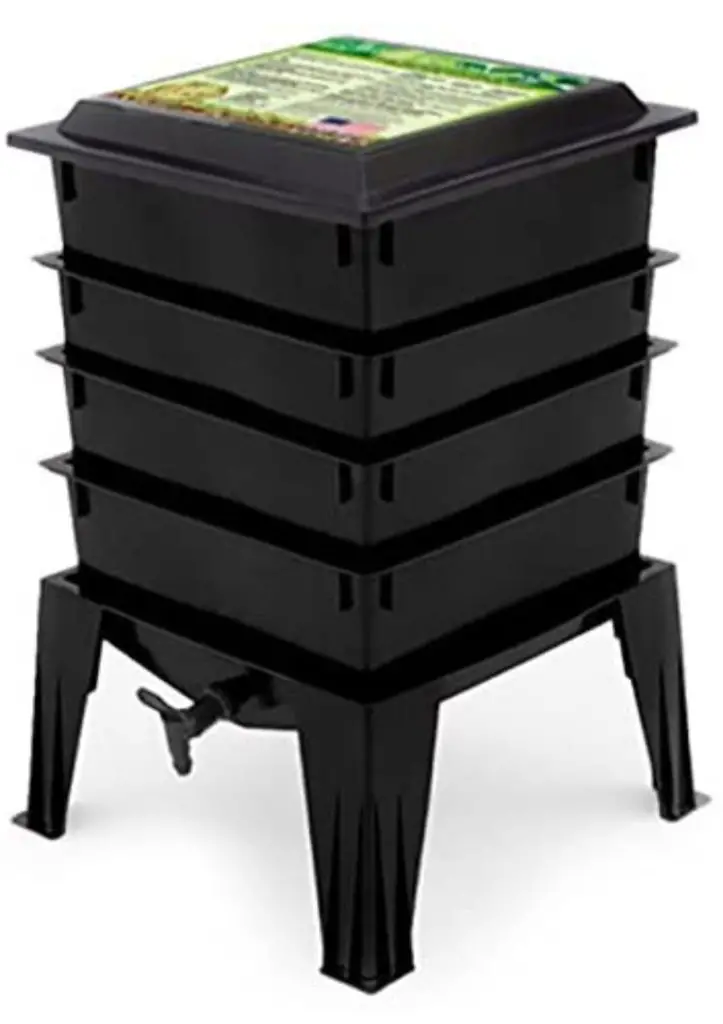
Compost bin for worms with a nozzle for compost tea. 
Vermiculture
The common material used in this design are live ‘Red Worms’, wire or vinyl mesh, one or more stacked plastic containers and of course your table scraps. This bin does not necessarily support the same composting processes as mentioned above because much of this process is taking place in the gut of the Red Worm. The idea behind the vermiculture (worm) bin design is to have a place to put your table scraps that can be actively composted using live worms. The final result is a fine collection of nutrient-rich worm castings (aka vermicompost) that can be added to enhance the soil of the garden and in some cases depending on the design: worm tea. Worm tea is a nutrient-rich collection of excess liquid that accumulates at the bottom of the vermiculture (worm) bin. Worm castings and tea are ideal for use on indoor/outdoor potted plants.
Pros: This design provides an excellent alternative to throwing away food scraps and produces a very healthy, and nutrient rich compost for plants to grow. Worm castings retain moisture and will anchor nutrients to the soil versus allowing them to leach away when watered. The worm tea produced contains microbes that can help suppress diseases like ‘root rot’ and contain minerals useful for your plants. It would also provide a fun project for the kids to observe the worms and stay busy maintaining the worm habitat and understanding the vermiculture process.
Cons: This design does require understanding the vermiculture process along with paying careful attention to the conditions and what is taking place in the bin on an almost daily basis. Things can easily go south if temperatures become too hot or cold, or the wrong table scraps are placed in the bin. Not all table scraps can be placed in the bin (e.g., meats, oils, and animal fats) as these may be harmful to the worms. Also, not all worms are composting worms. The ideal worm is the ‘Red Worm’ and not the typical earth worm you will find in the garden. Earth worms behave differently when placed in the vermiculture bins and tend to burrow down versus burrow up towards the food and will often try to escape the enclosure. Red Worms do need to be purchased separately for the ideal vermiculture environment. Another issue with this design is volume. You will not be able to compost the same volume of materials as the other designs mentioned above. It is still possible that you will generate more table scraps than space to place in the vermiculture (worm) bin. For best results, table scraps should be sliced and diced (pulverized even) into much smaller pieces to assist in decomposition as worms have small mouths and can use this extra step. This does require time and some people may not have the time to do it. Worms will consume only so much material and produce so much vermicompost at a time which makes it more suitable for potted plants versus entire garden beds.
7. The Hybrid Compost Bin
The common material used in hybrid bins is a combination of all materials and designs mentioned above and more. We stress ‘and more’. It is possible to have wire mesh tumblers, garbage can tumblers, garbage cans with wire mesh, wood compost bins with open bottoms to utilize natural vermiculture. You may have a number of other materials not mentioned such as utilizing stacking bricks / pavers versus wood, and using PVC pipes for enhanced airflow or to collect “tea” from the bottom of a plain ol’ compost pile. Hybid bins may include additional technology such as wireless thermometers to measure the temperature of the composting or wireless sensors to measure moisture content to ensure the optimal composting reaction is occurring. The hybrid bin could contain a motor armature that is scheduled to slowly turn the compost within the bin. The process can be monitored on your computer from the enjoyment of your own home. For the uber-serious composter, there is nothing more enjoyable than seeing a compost pile steam. That means that the compost pile is at its most optimum efficiency (this will be discussed in a separate post).
Pros: This design may include many of the pros mentioned above. It provides the opportunity to create something that has not been created before and perhaps more efficient than the typical designs / materials mentioned above.
Cons: This design may include many of the cons mentioned above. There is room for risk in trying out new designs or materials. Hybrid bins may cost a bit more money than the alternatives mentioned above.
Compost Activities with the Kids
Conclusion
In this post, The Grow Monster has presented and weighed in on seven composting options from having a plain ol’ compost pile to using a hybrid approach with the options listed. Whether you are using one option over the other, what is important at the end of the day is that compost -or “black gold” as they say- is being created for your garden. What options are you currently using, or plan on using? Would you like to know more about a particular option? The Grow Monster certainly wants to hear from you, so please feel free to leave your comments below.
Pingback: Perlite vs Vermiculite in Mel's Mix - The Grow Monster
Pingback: Is It Too Late to Plant Daffodils: 4 Tips Best Time to Plant! - The Grow Monster
Pingback: Is it Too Late to Plant Alliums: 3 Tips to Plant All Year! - The Grow Monster
Pingback: Grow Wildflowers with Children: 5 Easy Steps! - The Grow Monster