

Making your own maple syrup can be a rewarding experience for the entire family. We at The Grow Monster had the opportunity to make our own maple syrup following the purchase of our very first house after discovering maple trees on the property. This post will help you make your own Maple syrup and enjoy that homemade sweetness every year!
Make your very own maple syrup by following these easy steps:
- Step 1: Find your trees
- Step 2: Tap your trees
- Step 3: Boil sap into syrup
Step 1: Find Trees to Make Your Own Maple Syrup
The first step to make your own maple syrup begins with finding the right trees.
What kind of tree to tap? Surprisingly, there are a wide variety of deciduous trees that produce sap that can be boiled into a syrup. Though, maple trees are by far the most popular and have the higher sugar content in their sap. Read this article for 2 ways to identify a Maple tree. These trees include:
| Maple Trees | Birch Trees | Others | ||
| Sugar Maples (Acer saccharum) | Paper Birch (Betula papyrifera) | Black Walnut (Juglans nigra) | ||
| Black Maple (Acer nigrum) | Yellow Birch (Betula alleghaniensis) | Butternut or White Walnut (Juglans cinerea) | ||
| Red Maple (Acer rubrum) | Grey Birch (Betula populifolia) | Sycamore (Platanus occidentalis) | ||
| Silver Maple (Acer saccharium) | Sweet Birch (Betula lenta) | Ironwood, hophornbeam (Ostrya virginiana) | ||
| Canyon Maple (Acer grandidentatum) | Alaskan Birch (Betula neoalaskana) | Heartnut (Juglans ailantifolia) | ||
| Boxelder (Manitoba) Maple (Acer negundo) | Alder (Alnus genus) | English walnut (Juglans regia) | ||
| Big Leaf Maple (Acer macrophyllum) | Black birch (Betula lenta) | Bradford Pear (Pyrus calleryana) | ||
| Norway maple (Acer platanoides) | River birch (Betula nigra) | |||
| Rocky Mountain Maple (Acer glabrum) | European white birch (Betula pendula) | |||
| Gorosoe (Acer mono) | ||||
What trees should you avoid tapping? There are trees that should be avoided when tapping. Always be sure to positively identify the trees that you are tapping before collecting their sap as some trees are toxic to human health.
How big of a tree to tap? Trees at a minimum should be between 10 to 12 inches in diameter to tap. Tapping any trees smaller than 10 inches might place burden on the tree either from the damage caused by the tap in relation to the tree size and/or by draining the limited sap resources available for the small tree as it prepares to bud for the spring.
What if you don’t have a tree to tap? If you don’t have a tree on your own property, your neighbor might have a maple tree or two to tap with their permission. If there are no trees to tap at all in your area, you can still make your own syrup by growing either the sugar beet or sugar cane. If you are unable to grow either of those in your area, you could still make a tasty syrup using plain old granulated white sugar (which is generally made from either beet sugar or cane sugar). Don’t feel down if you have to resort to this method as many of the popular and affordable generic brands of pancake syrup contain no ‘maple’ at all. However, you can still make sugar with an old fashioned recipe found here.
Step 2: Tap your trees
The next step to making your own maple syrup is tapping your trees.
When do you tap a tree? Tapping trees depends solely on temperature. You generally want to have a tap in the tree when sap is flowing at its heaviest up the tree during the late winter and early spring months. Traditionally, this time has been between the middle of February and the middle of March depending on the area where you live. You will want to have that tap in the tree when temperatures are above freezing (around 40 degrees Fahrenheit) during the day and below freezing at night. You can tap a tree as early as middle of January as some sugar makers have experienced changes in their season along with the quantity of taps they need to prepare ahead of the flow. Tapping a tree later in the season will yield less sap as the sap flow becomes lighter as average temperatures begin to hit over 50 degrees Fahrenheit.
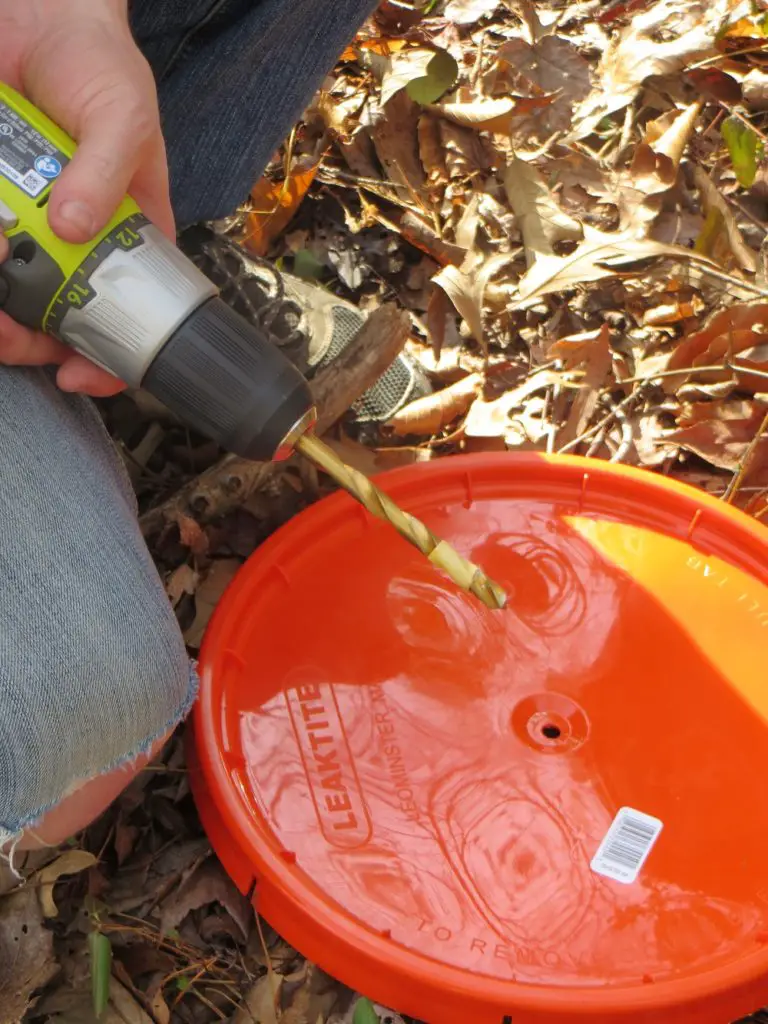
What do you need to tape a tree? There are a variety of systems (both old fashioned and modern) available for tapping trees. Tapping trees will require a couple basic items depending on the basic system used:
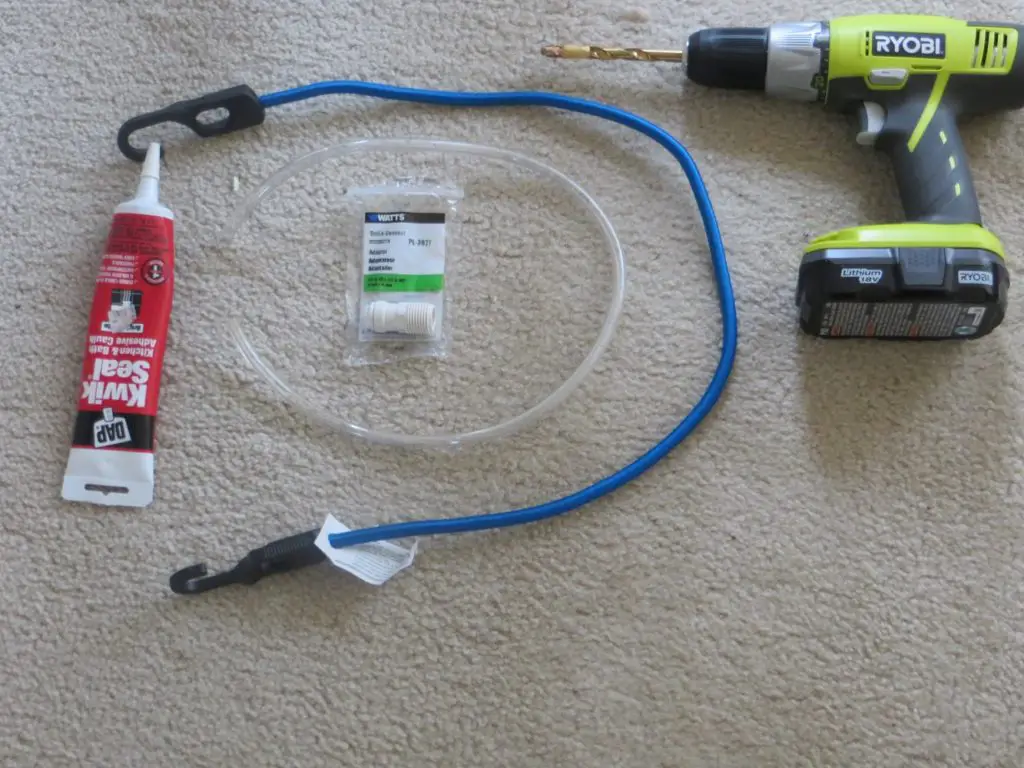
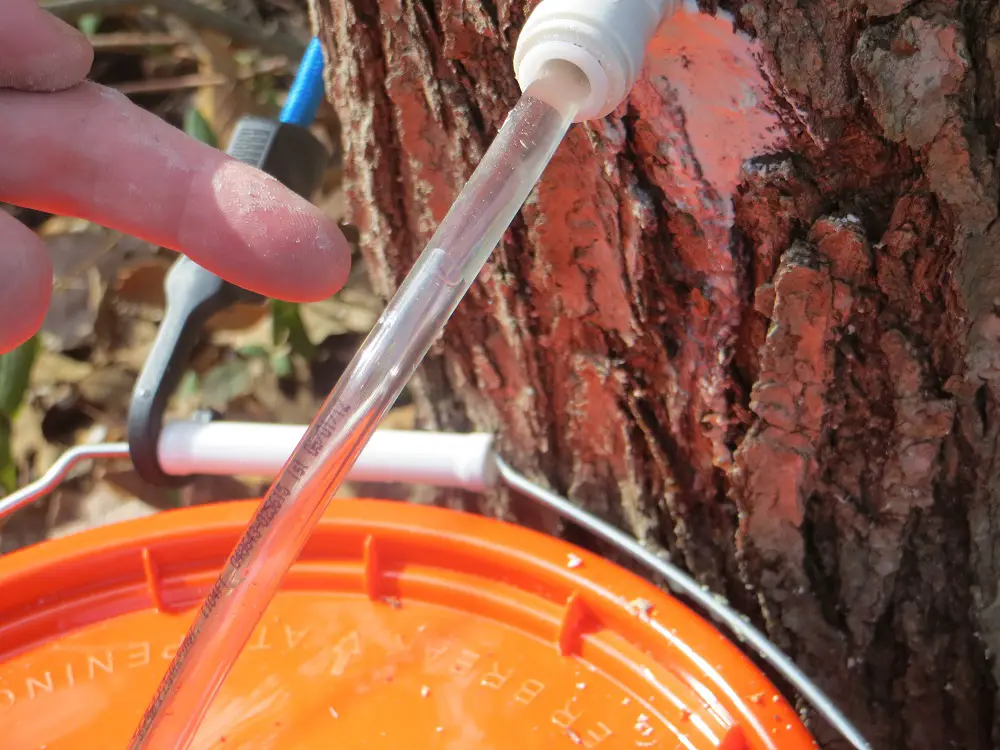
- Spile (spout) – (can be metal, plastic/PVC, and wood of various types and designs with or without a hook to hang the collection bucket)
- Drill
- Drill bit (to match spile size and sharpened for a clean-cut hole)
- Collection hose (optional if not hanging bucket/bag from spile)
- Collection bucket (with lid to deter animals and keep out debris) / collection bag (metal or food-grade plastic)
- Wool filter bag or wire mesh (to filter debris between the collection bucket and storage container).
- Metal hook (if spile does not provide a hook to hang the bucket from)
- Hammer (rubber mallet preferably)
- Large food-grade storage container(s)
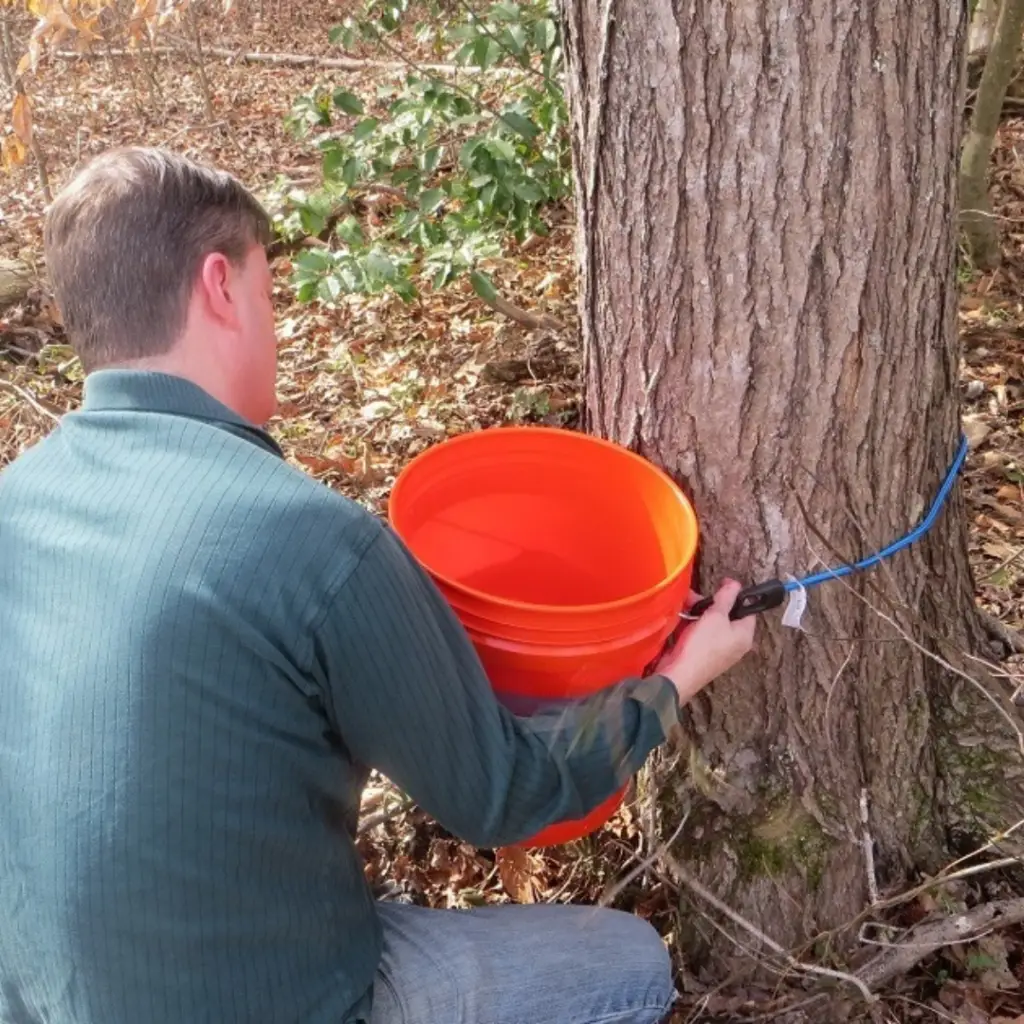
Where do you tap a tree? You will want to have your taps placed on the south side of the tree below large branches or above larger roots that you can visually see from above ground. The reason for this is because the sap flows faster on the south side of the tree due to the heat generated from the sun and the larger branches and roots will see more traffic in the way of sap. Taps should be placed anywhere from 3 to 4 feet off the ground. Avoid using the same tap holes from the previous year as the tree is still recovering. Try tapping 6 inches to either side of the hole from the previous year.
How many taps can you have on a tree? A tree may be able to have more than one tap depending on its size. A tree that is 10 to 17 inches in diameter should only accommodate one tap. A tree that is 18-24 inches in diameter can accommodate 2 taps. A tree that is 25 inches or more in diameter can accommodate three taps. If more than one tap is to be placed on a tree, be sure the taps are far enough apart based on the size of the collection buckets being used.
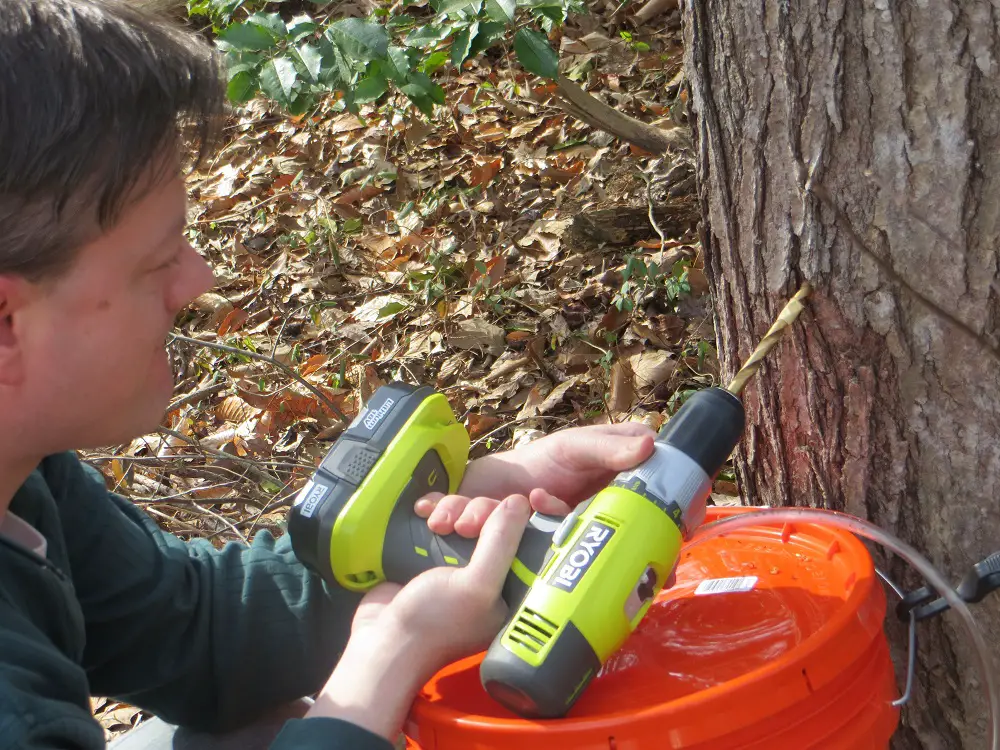
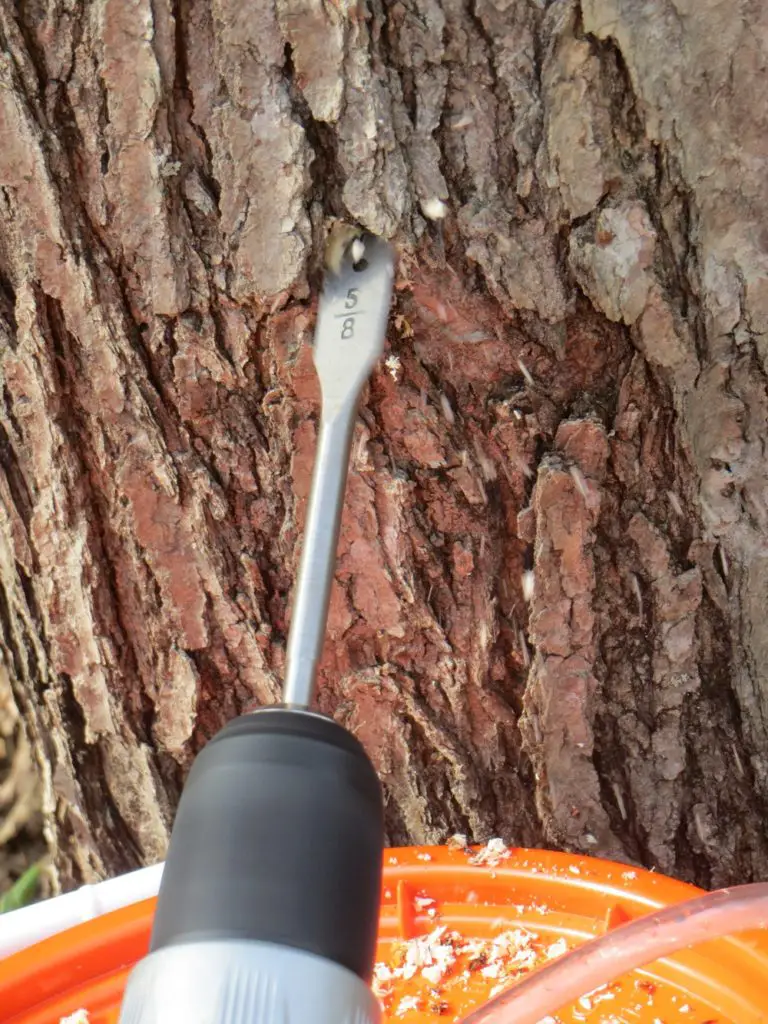
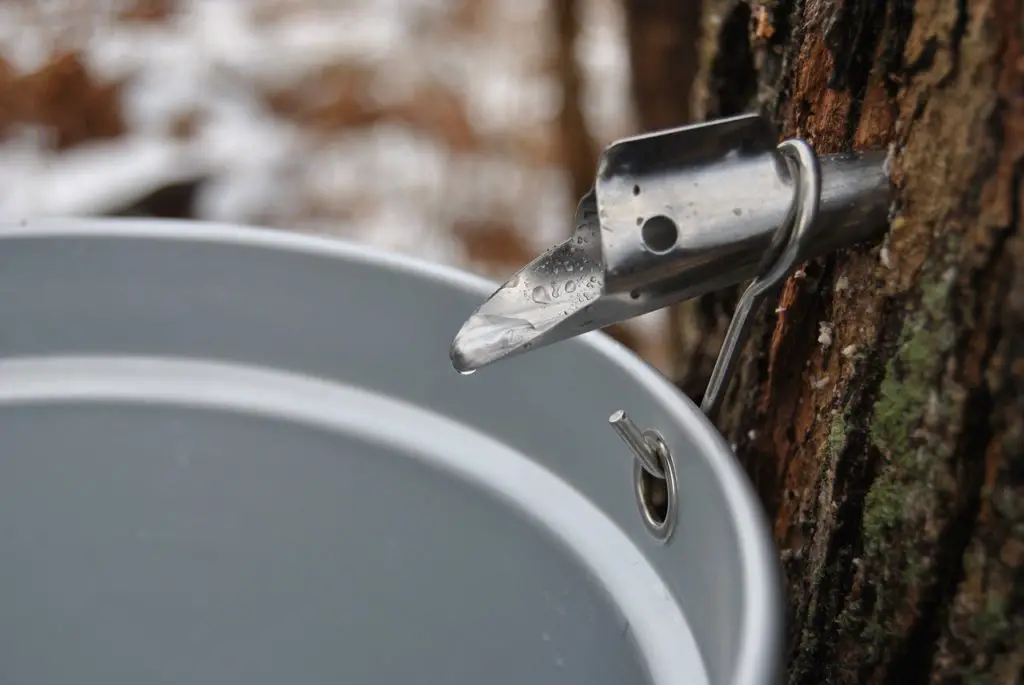
How do you install the tap? Depending on the spile system used, holes for the spile should be bored at a depth between 2 and 2.5 inches deep and at a slightly upward angle (between 5 and 10 degrees) to promote the downward flow of sap through the spile and into the bucket/collection system. The diameter of the bore hole itself will depend on the recommended diameter of the spile system being used. Using a drill bit to bore a hole that is too large for the spile may result in sap leaking along the sides of the spile and down the tree trunk. Consequently, using a bit that is too small for the spile may result in not being able to hammer the spile all the way into the tree and therefore wont support the weight of the collection bucket when filled. Gently tap the spile into the tree with a hammer, or preferably, a rubber mallet to avoid damaging the spile.
Do taps hurt the tree? Tapping a tree for sap is no different from you having a needle in your arm when donating blood to the Red Cross. As with any open wound, there is a risk of infection by a variety of microbes such as fungi, bacteria, and yeasts. This becomes an issue when tapping later in the season as temperatures rise and the tree attempts to fight the active infection. Much like clotting blood, as the weather warms, a gummy substance will form in the tap hole, decreasing the flow of sap. As with human health, the same goes with tree health: sterilize tools and spiles (spouts) with either heat, light bleach solution (1 part bleach to 20 parts water), or alcohol before installation. As with human wounds, tap holes will begin to close once the tap has been removed for the season. You may notice a slight scar in the bark on the tree the following season, which is purely natural.
How often do you collect the sap during the season? Harvesting the sap must be a daily activity until buds begin to appear on the tree themselves. Any sap collected after the buds appear will have an off-flavor, which might be undesireable. Sap could go bad (becomes cloudy) if left in the collection bucket for an extended period of time and must be refrigerated if it isn’t boiled immediately. Think of sap as you would a gallon of milk and we all know how spoiled milk tastes and smells. On days above freezing, sap that is left in a bucket on the sunny side of a tree could warm up pretty quick providing microbes the heat and time necessary to start feeding on the sugars, which might spoil the sap for syrup production. Another reason to collect sap daily is due to overflow. Buckets could overflow with sap on those days when sap is running its heaviest. The long and short of it is to collect the sap and boil it down as soon as you can. Experienced sugar makers have a saying, “If it is not boiling, it is spoiling.”
How much sap can one tree produce? Depending on the tree, the tree size, number of taps, and when you start tapping, they can produce between 10 and 80 gallons of sap for the season.
What containers do you collect and store sap in? Sap should be collected, moved, and stored temporarily in sanitized food-grade storage containers. A five gallon bucket for the urban gardener is ideal . When transitioning the sap from the collection bucket to the storage container for transport, be sure to to filter out any debris (e.g., leaves) that may have fallen into the collection can with the sap. You might use a wire strainer from the kitchen or use a wool filter bag specifically designed for the filtering of sap and liquids.
Should you throw away any ice that has accumulated in the collection bucket? This question is certainly up for debate among producers. Water will always freeze first in a sugar-water concentration. Case in point, if you have ever tried freezing a sugar drink in the freezer, what is the last thing to freeze in the container? Answer: the sugar. At first glance, it might make sense that throwing this ice away will save time boiling as it doesn’t have the same sugar content as the thawed sap. Understand, that when you pull the ice out, it is still dripping with sugar-concentrated sap, so ‘yes’ the ice you are pulling out is still sugar-coated in a way. If you have more than enough buckets of sap to boil, then it might be economical to shave off some boiling time by throwing out the ice. For the urban sugar maker, you most likely won’t have gallons and gallons of sap at your disposal to boil off. Yes, every bit of sugar counts – even the trace amounts of sugar that is still available in and around the ice.
Step 3: Boil Sap into Syrup
This step is the actual conversion of sap into syrup. It is probably the most work-intensive step in the whole process. To get an idea of how much sap it takes to make syrup the general ratio is about 40 gallons of sap to make 1 gallon of syrup (40:1). This ratio may vary depending on the type of tree being tapped.
What equipment do you need to boil sap into syrup?
- Boiling pot
- Boiling pan
- Candy thermometer
- Sap hydrometer (to measure sugar content level)
- Wool felt / cheese cloth / wire strainer
- Syrup bottle(s) for final storage
What are the steps to boiling syrup?
- Strain the Sap. Use a wool felt/ cheese cloth / wire strainer to filter out any debris when pouring sap from the sap collection / storage bucket into the boiling pot.
- Fill the Boiling Pot. Fill the boiling pot until it is about 3/4 full.
- Boil down the Sap. Place the boiling pot over the heat source and let boil.
- Measure and Monitor. You may continue to add more sap to the boiling pot as it boils down. The longer the sap boils, the more concentrated the sugar solution becomes. You can use a sap hydrometer to measure this concentration of sugar to water density. Commercially, maple syrup cannot be sold legally until it reaches a density of at least 66% sugar and this generally around 3.94 degrees Celsius / 7.10 degrees Fahrenheit above the boiling point of water in your area. Depending on your state, you might need to have your sap hydrometer inspected if selling commercially. Eventually you will boil the sap down until it reaches a golden color at around 218 degrees Fahrenheit as can be measured with a candy thermometer.
- Transfer to Boiling Pan. At this point you can transfer this sap to a smaller boiling pan to complete the process inside. When transferred to a smaller boiling pan, you continue to boil the sap until it reaches the consistency of syrup (when it begins to stick to the spoon). You will need to ask yourself what grade of syrup you’d like to produce. If you like it to be light colored and runny, you will want to take the syrup off the heat sooner. If you want it dark and thick, you will leave the syrup on the heat longer until it reaches the desired consistency. Don’t leave it on the heat source for too long, otherwise you risk burning it.
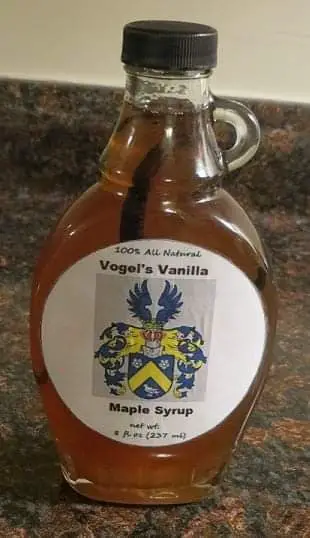
- Bottle your Syrup. You might consider using an old syrup bottle to store your syrup. The Grow Monster saved an 8 fluid ounce glass syrup bottle and made a custom label to go with it. We also threw a vanilla bean into the bottle with the syrup for that extra vanilla flavor.
Where should you boil the syrup?
The Grow Monster has learned that boiling syrup generates a lot of steam. When we boiled down sap for the first time, we did so in the house. The house filled with the smell of boiling maple sap, which was nice. Even though we boiled down about 5 gallons of sap to produce 16 fluid ounces of syrup, the house did become quite humid. We noticed condensation building on the windows, cabinets, and walls. The moisture was even accumulating on the picture frames. If we were to do it again, we’d recommend boiling down the syrup outside. By boiling sap outside, you avoid the humidity that accumulates in the house. You also can boil the sap down over a larger heat source and in a larger pot, which would cut the boiling time down significantly.
What are the different grades of syrup? There were traditionally three grades of syrup labeled ‘Grade A’ thru ‘Grade C’ since 1985. These are described in the table below:
| Grade | Name / Description |
| Grade A | ‘Fancy’ or ‘Vermont Fancy’ (Light) |
| Grade B | Medium to Dark Amber |
| Grade C | Very Dark – typically reserved for commercial food production. |
However, by the year 2014 -to assist in better marketing of syrup locally and abroad- the International Maple Syrup Institute (IMSI) changed these grades all to ‘Grade A’ with a distinction between color and taste. It was determined that the quality of syrup should be high -thus the ‘Grade A’ label- regardless of color and taste. In the old system, the everyday consumer was mistakenly understanding the ‘Grade B’ and ‘Grade C’ syrups as somehow being inferior to ‘Grade A’ syrups, which isn’t the case at all. We all want to be ‘A’ students right? The fact of the matter is that we all have different tastes and requirements for maple syrup. Some folks desire the light, delicate taste where others might prefer the dark robust flavors. The updated system is noted below:
| Grade | Color | Taste | Usage |
| Grade A | Golden Amber | Delicate | Recommended for toppings on ice cream, pancakes and waffles. |
| Grade A | Amber | Rich | Recommended for baking. |
| Grade A | Dark | Robust | Recommended for recipes involving strong maple flavors. |
| Grade A | Very Dark | Strong | Recommended as a substitute for molasses and making maple-flavored candies. |
| Processing Grade | — | — | This grade does not meet ‘Grade A’ requirements and is not available for retail. However, it is used as an ingredient in the production of other foods. |

Activities with Children
Practice making ‘Simple Syrup’ using plain ordinary sugar. Have them record how long it took to boil the sugar solution into syrup at their desired consistency. Is the solution getting sweeter the longer you boil it? Use a hydrometer (if available) or spoon to taste test. The recipe to making ‘Simple Syrup’ is as follows:
*1 cup water
*1 cup granulated sugar
1 jar for storage
extra spices / ingredients (optional)
Place the water and sugar into a sauce pan and stir until sugar is dissolved. Boil the water down at medium heat in the pan until the syrup becomes the desired consistency. Optionally, you may add a number of other spices/ingredients to the syrup for flavor (e.g., cinnamon, vanilla). Once the syrup is cool, place the syrup into the jar for storage.
Follow the same ingredients in the recipe as above, however, instead of boiling, freeze the sugar concentration. After every two hours, collect the ice that accumulates and place in a separate container. Is the solution becoming more concentrated (sweeter)? Use either a sap hydrometer (if available) or spoon to taste test. You can also boil off the remaining ice that was collected with the kids to answer the question: was there any sugar existing in the ice? You can either use the sap hydrometer or spoon to taste test that as well.
Final Thoughts
If you’ve got Maple trees on your property, try your hand at creating your very own Maple Syrup. All you need to do is identify your trees, tap the trees, and boil down the sap in to syrup. It is a really fun process, great for children to help, and not only will your syrup taste group but your home will smell wonderful from boiling the sap!
Pingback: Is This a Maple Tree? 2 Simple Ways to Identify a Maple Tree - The Grow Monster